Spacecraft: Configuring Components
Adding Components
There are two main ways to add components to spacecraft in Nominal Editor. Each has its pros and cons but both will correctly add them to the simulation backend and correctly simulate them.
- Blueprint Asset: The first is to add it to the spacecraft object and position the objects using the visualization tool. This is useful for visualizing component layouts, but cannot be swapped out easily and components are more hard-coded into place.
- Simulation Blueprint: The second is to spawn the components individually on the simulation blueprint attach the objects manually to the spacecraft and adjust the transform. This makes it trickier to set the correct position and orientation but allows for easier swapping of components setting default parameters.
This tutorial will cover the second method and will show how to configure and create components attached to the spacecraft in the level blueprint. Although all components are different, there is a standard across all components spawned.
- When attaching a component to the spacecraft, the spacecraft must be the owner of the component (unless attaching to a sub-component).
- The local position and local rotation of the component are the relative position and orientation relative to the spacecraft (or owner). These are also in the right-handed coordinate system.
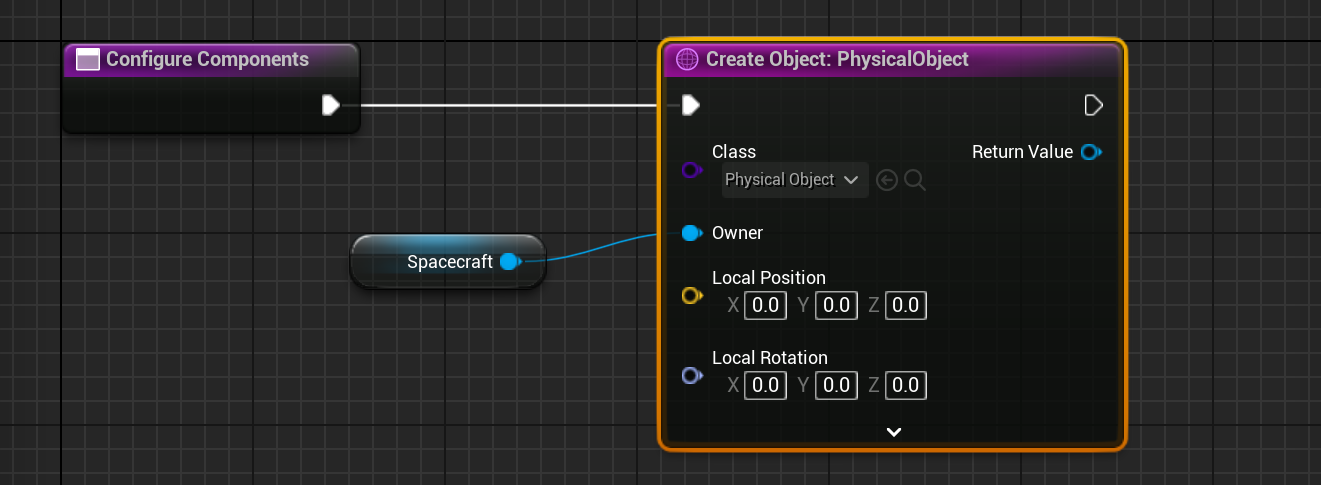
- The
Physical Objectclass is the standard base class for all components and includes a mesh, mass and position that can be configured.
Start by creating a new function on the simulation blueprint called Configure Components. Here, use the Create Object node to add a specific component. It is important to ensure that the spacecraft is set to the Owner pin of the creation node. If this is not selected, the object will be added to the level floating in space.
Adding a Solar Panel
Solar panels are components that can convert solar energy into battery power. A simple solar panel can be attached to the spacecraft using the BP_NS_SC_SolarPanel_3U_XY object. This is a 3U side-solar panel that can be added to a spacecraft. This object can be added to the spacecraft and by modifying the transform, the correct orientation can be used.
Note
When spawning components, the downside is the rotations can sometimes require a bit of guesswork to determine the correct location. A standard process would be to use the blueprint editor to create spacecraft once the model has been designed.
In this example, as the solar panel starts facing up, a 90-degree rotation can be made.
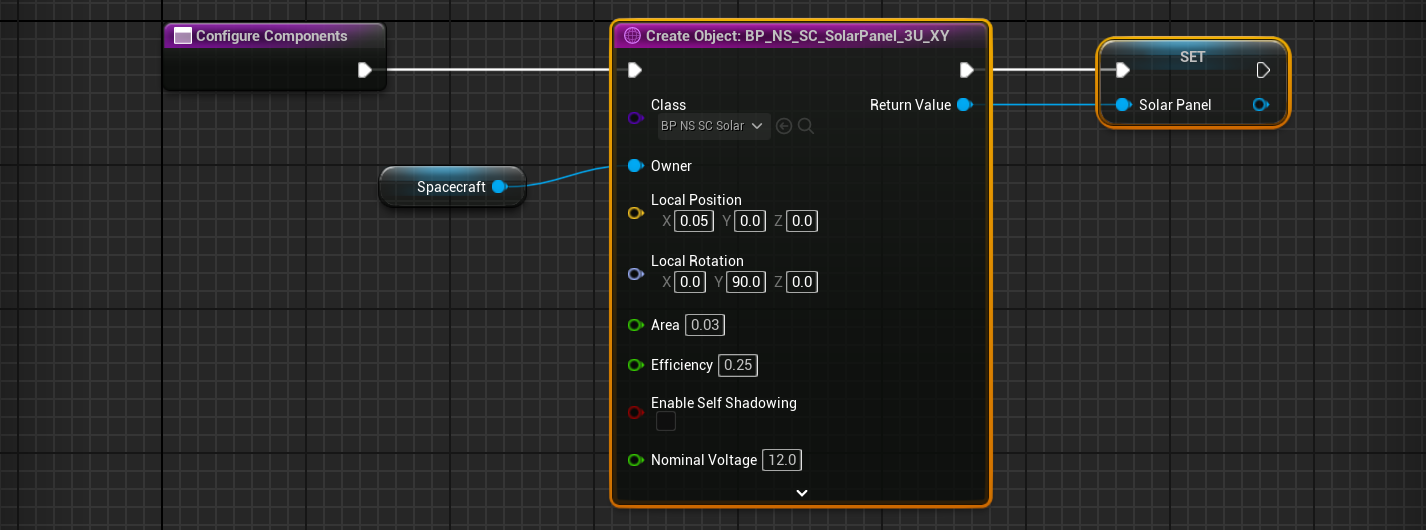
The variables exposed are some default parameters. For solar panels, they are:
- Area: The total area of the solar panel in \(\mathrm{m^2}\). This has been configured correctly for a 3U side panel.
- Efficiency: The fraction of sunlight converted to instantaneous power (between 0 and 1).
- Self Shadowing: A flag that specifies whether the solar panel will use Unreal’s ray-casting system to determine an accurate shadow factor from other objects on the spacecraft.
- Nominal Voltage: The voltage produced by the solar panel when receiving power. This is used for EPS simulation design and can be left as the default.
A solar panel will produce a power output regardless if there is an EPS (electrical-power system) node attached to it. For this tutorial, this will be the only EPS node in the spacecraft system. It is good practice to store each component as a variable so it can be accessed later.
Adding Reaction Wheels
Reaction wheels are complex physics devices that can adjust the mass properties of the spacecraft such that torques on the wheels can adjust the orientation of the spacecraft in space. A typical reaction wheel stack may contain three or four reaction wheels, all oriented in different axes. By spinning the wheels at specific speeds, the reaction wheels can allow a spacecraft to orient itself in a particular direction over time. A sample configured reaction wheel stack is the BP_NS_SC_ReactionWheels_Quad component, which creates four reaction wheels.
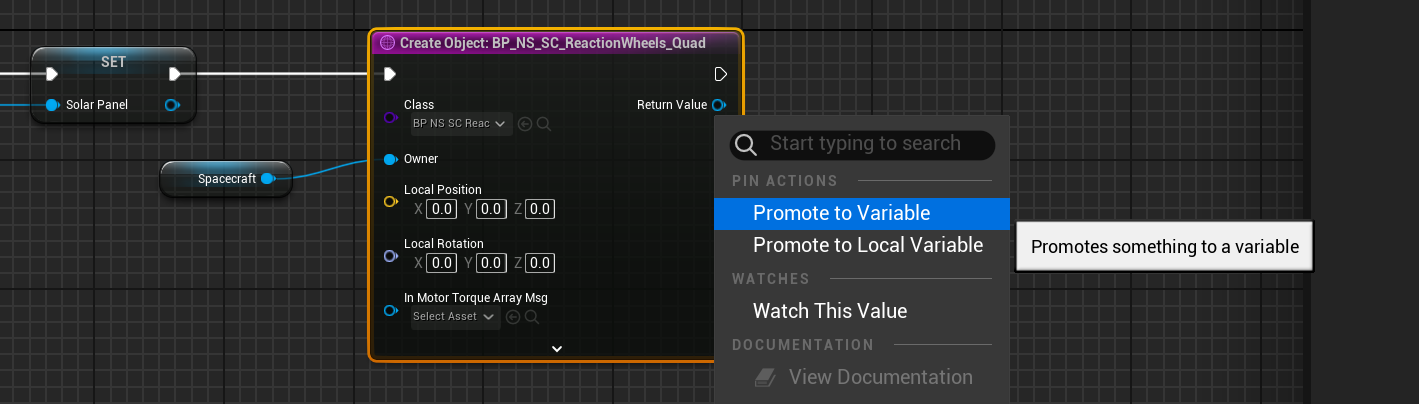
Reaction wheels are complex components. The exact configurations of the wheels are not discussed in this tutorial. The default values present on the reaction wheel stack define the friction and initial speeds of each of the wheels on the stack.
Adding a Guidance Computer
The final component to add to this spacecraft is a guidance computer. This component will create a series of software chains that will allow the spacecraft to orient itself in space. The guidance computer requires a reaction wheel stack to exist on the spacecraft to function correctly. Guidance computers allow for the spacecraft to change pointing modes during a simulation stack and handle the software connections internally. They are typically used for testing functionality and custom software will replace the chains for complex simulations. The standard is the BP_NS_SC_GuidanceComputer component.
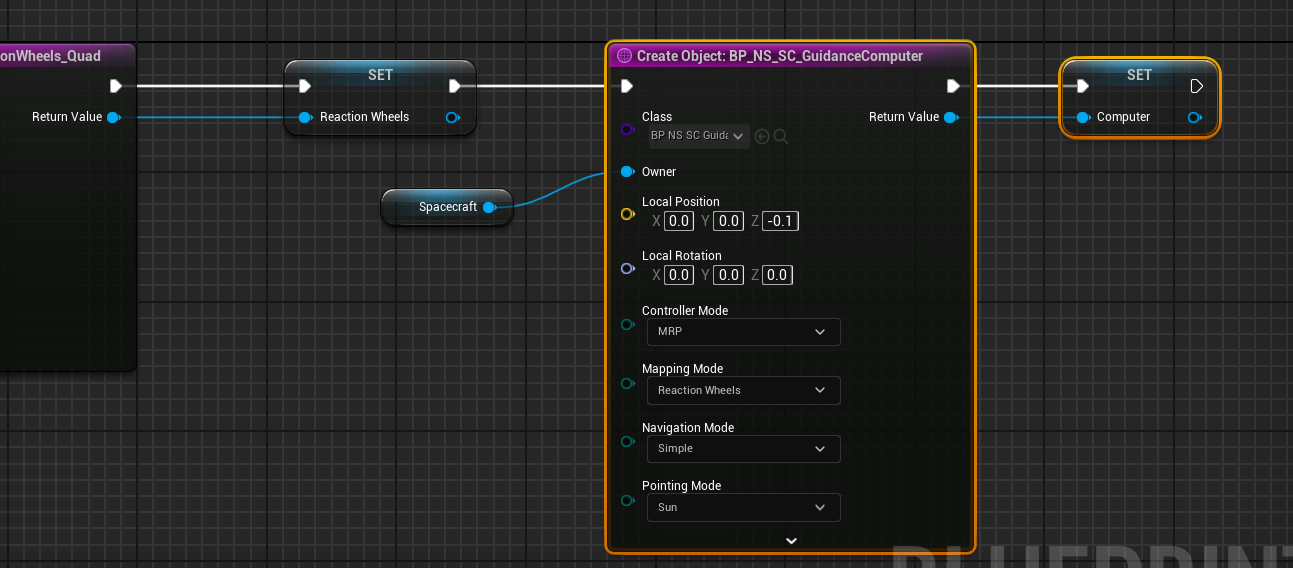
Four key software chain parameters can be adjusted here. The values should be changed to the above to achieve the defaults:
- Navigation: This defines how the state of the spacecraft is estimated. The
Simplenavigation mode uses the actual state and adds a small number of errors to the state. - Pointing: This defines which pointing mode should be executed and what the guidance should be. The
Sunpointing mode will attempt to point the solar panel’s up-vector towards the sun. - Controller: This defines the type of control feedback that the control loop will be executing. The
MRPcontroller uses a standard PID control loop for passing feedback data back to the software. - Mapping: This defines the type of actuator mapping that the software should be applying to the calculated torques. The
Reaction Wheelsmapping controller will result in the reaction wheels applying the correct torques.
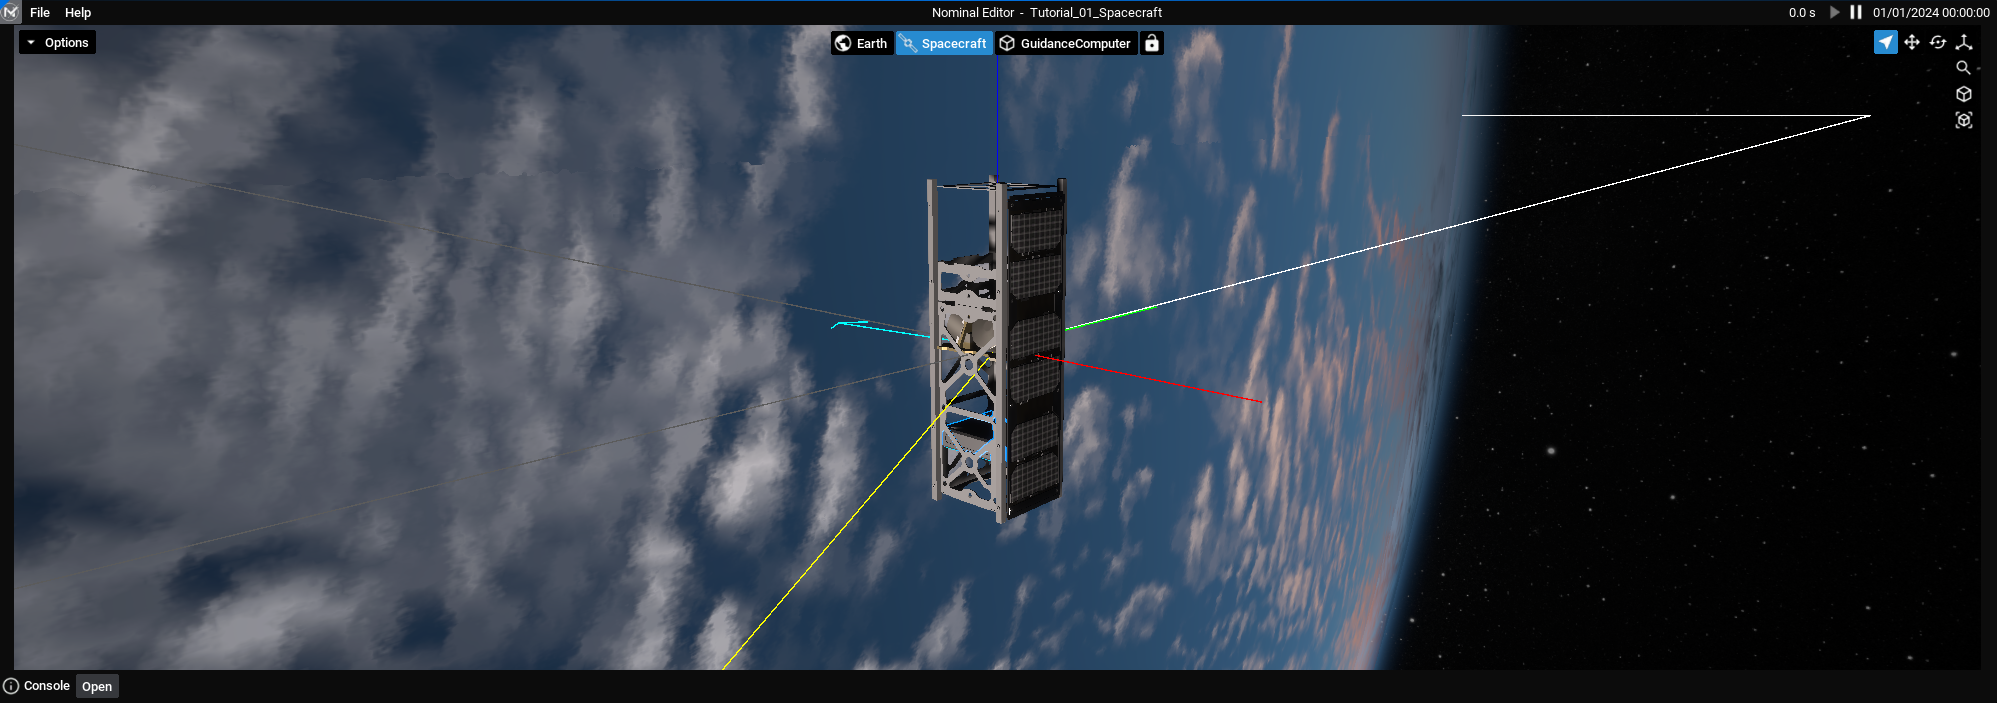
Visualizing the Components
Once all three components have been added and the function added to the end of the Begin Play event on the level blueprint, running the level will show the three components added to the spacecraft. Again, the components will not be doing anything yet.
Note
To rotate around the level, right-click on the viewport and move the mouse around. Use the WASD keys to move around the spacecraft. Scrolling the mouse wheel will move closer and further away from the spacecraft.