Spacecraft: Configuring a Spacecraft
Constructing a Spacecraft
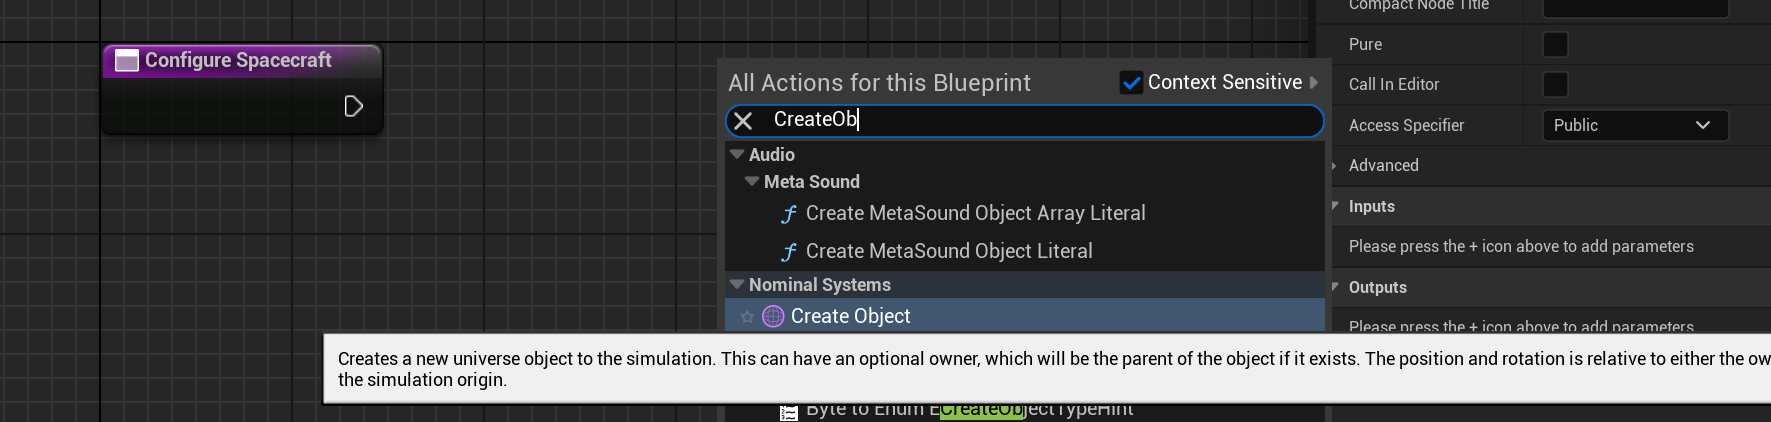
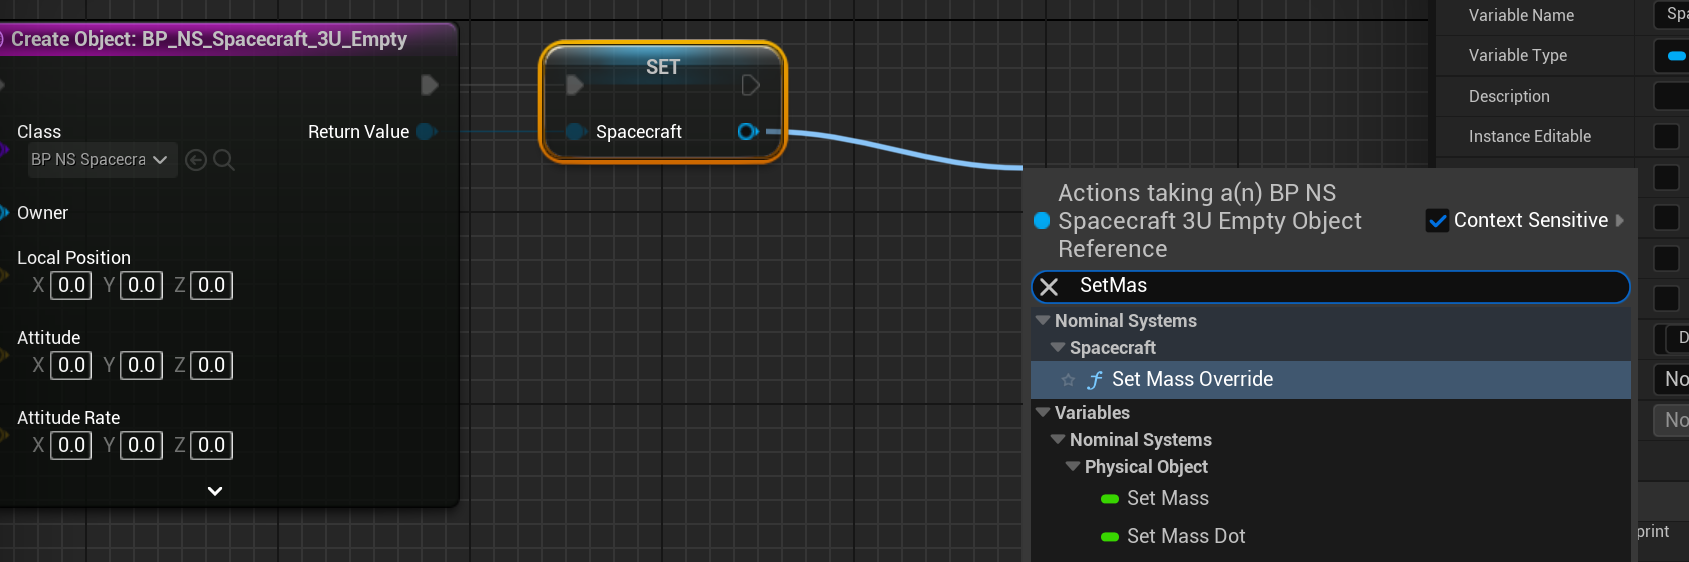
Similar to the Universe, a new function should be created here that will create the spacecraft into the level. This will be called Configure Spacecraft and can be created by adding a new function, in the same way it was done previously. Once created, double-click on the function name to open it up in the blueprint editor. To spawn a new simulation object, search for the Create Object Blueprint function.
Note
‘Spawning’ is the process of adding an Unreal ‘actor’ into the level and executing it. This applies to all physical objects, including components and spacecraft. This is an Unreal standard and the actual object that is being spawned can be changed on the blueprint node.
By default, the create object node will have an empty class. Instead, we will find the spacecraft class to spawn. An empty spacecraft is the Spacecraft class which includes no objects and is the base class for all spacecraft that exist within the simulation. As shown in a previous tutorial, there are several spacecraft that exist in Nominal Editor that have preconfigured components. These spacecraft can be found in the Content/Nominal/Blueprints/Spacecraft directory.
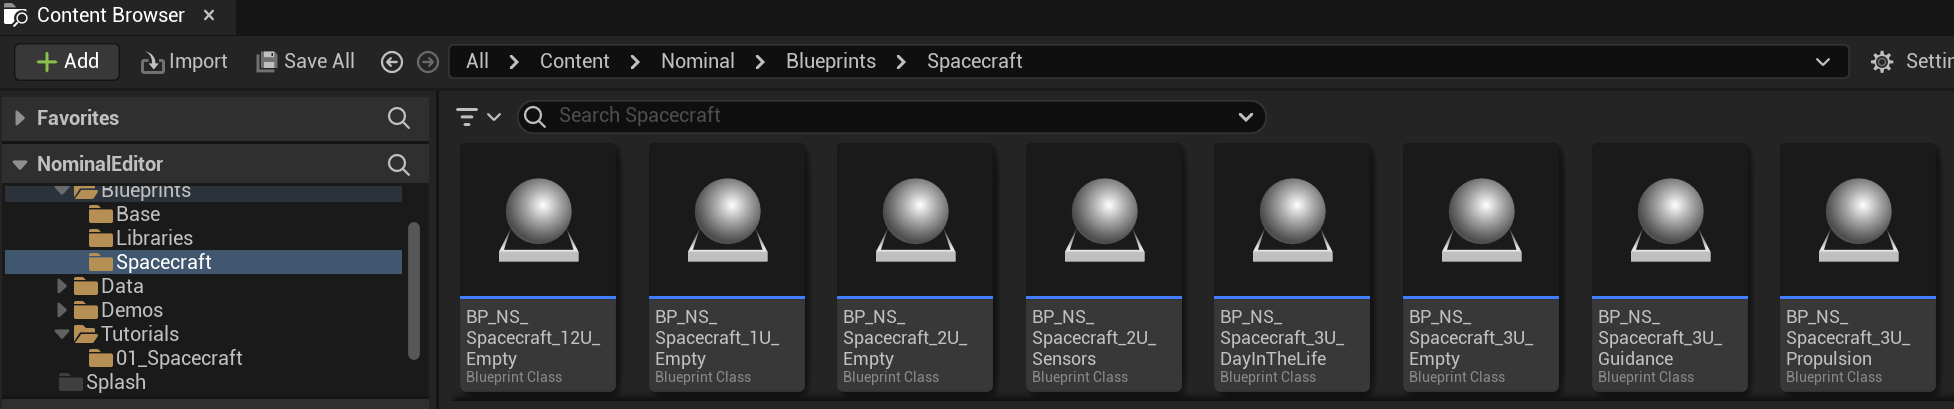
To view what the spacecraft class contains, double-click on the asset and open up the viewport. In the components panel, the list of added components is shown. In this tutorial, the BP_NS_Spacecraft_Empty_3U craft will be used. This craft contains a 3U cube-sat chassis and no other components. It is a simple base for adding more complex components and does not contain any base functionality. Back in the level blueprint, find this class by clicking on the class drop-down and searching for it.

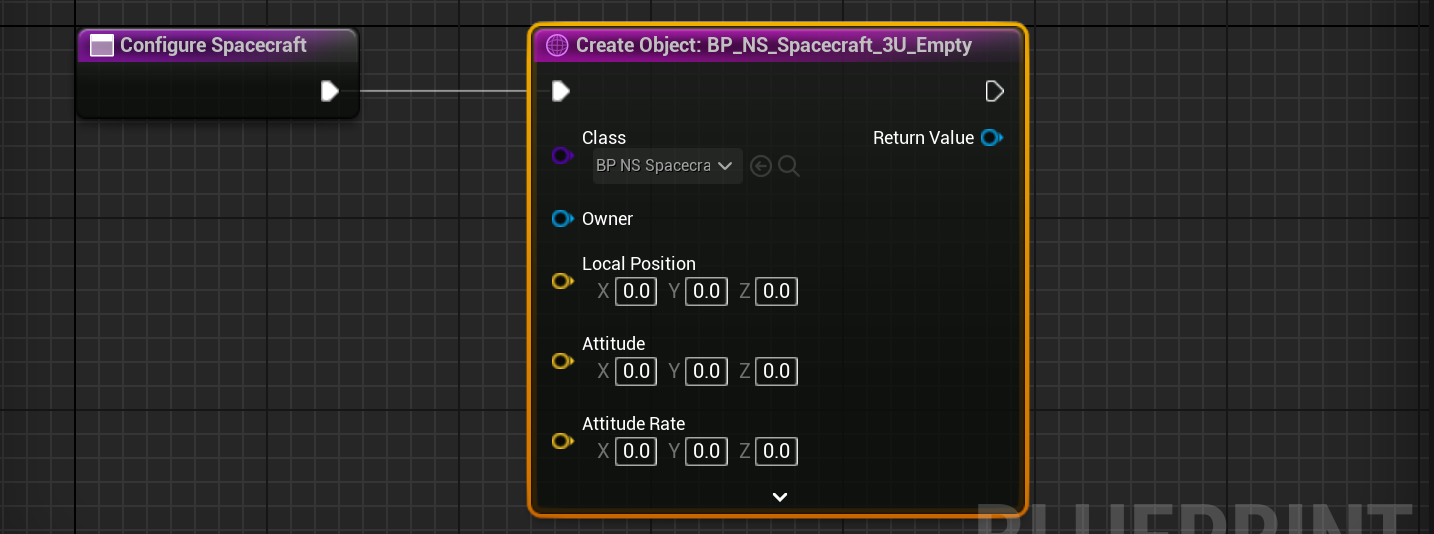
Any default variables that are marked as Expose On Spawn will appear here. In this spacecraft’s case, the following variables are exposed:
- Local Position: This will appear for all universe objects that are created and will be the position of the object relative to the parent. Since the spacecraft does not have a parent, this can be ignored.
- Attitude: This is the default orientation in Modified Rodriguez Parameters (MRPs) of the spacecraft at the start of the simulation. These values should be between -1 and 1 in each of the three axes.
- Attitude Rate: This is the starting orientation rate per second of the spacecraft. This is measured in radians per second and leaving a value of 0 will result in a spacecraft being stationary in orientation.
Note
Pressing on the arrow at the bottom of the node will show some additional parameters, including ‘Scale’, which will adjust the visual scale of the object, and ‘Name’ which can be used when finding objects of a particular name.
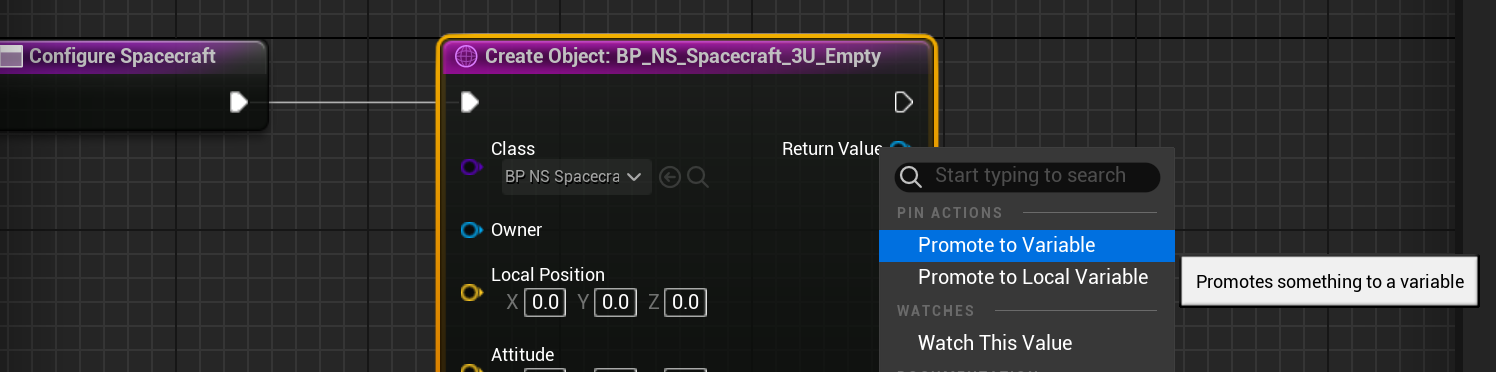
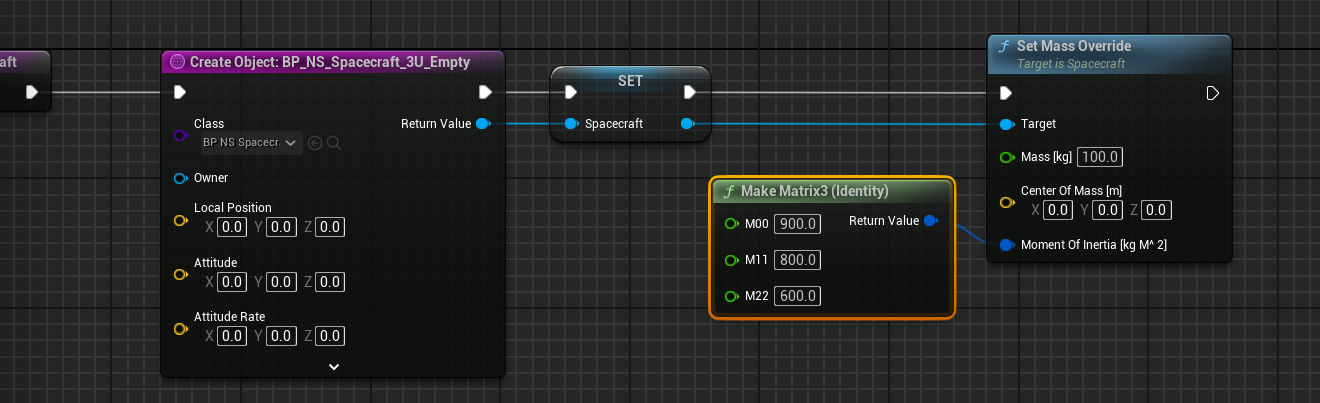
Since the spacecraft needs to be referenced multiple times in the level blueprint, it is good practice to store the object as a variable. Custom variables can be created using the outliner, but an easy way to do this is to right-click on the return value and select Promote to Variable. This will create a level-wide global variable that can be accessed throughout the level blueprint. Local variables are only accessible within the function call. Once created, the variable can be named Spacecraft.
Warning
By default, a variable will be of the type it was created from. In this case, it would be BP_NS_Spacecraft_3U_Empty. This class inherits from the default Spacecraft class. If the object that was created was changed later, the variable type must also be changed to ensure the base class is the same for all instances using it.
Setting the Mass
By default, a spacecraft will calculate the mass properties (mass, centre of mass and moment of inertia) based on the sums of the components and transforms attached to the spacecraft. This is useful for large simulations. For smaller and more simple simulations, often the user would prefer to override the mass properties. By calling the Set Mass Override function on the spacecraft pin, the mass values will override the calculated ones and the totals will not be determined by the components added.
An appropriate mass (in kilograms), the centre of mass (in meters) and the moment of inertia (in \(\mathrm{kg/m^2}\)) can be defined. Use the Make Matrix3 (IDENTITY) to create a diagonal 3x3 matrix for the moment of inertia.
Warning
Although setting the override mass can be useful for creating a configuration without adding all required components, for certain components (such as fuel nodes), using the override mass should be avoided. Fuel mass will not be calculated correctly if the override flag is on. In these cases, the remainder mass should be added to the chassis to reach the required amount.
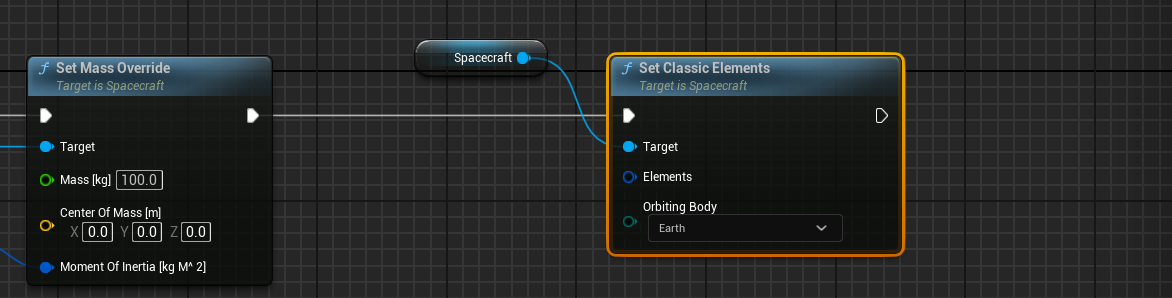
Setting an Orbit
There are several ways to initialize the position and velocity of a spacecraft in orbit. This tutorial will use the classical elements as the orbit. Without initializing, a spacecraft will be located in the Earth's centre and will not move when simulated. Use the Set Classic Elements to configure an orbit with the standard six Keplerian elements.
Note
To access a variable that was created, such as the Spacecraft, look in the variables tab in the Blueprint panel and drag the variable needed onto the blueprint graph. To call a function on a particular object, drag off the variable using the left mouse button and then search for the function to invoke. Make sure that the target is set to the variable, as it may not compile otherwise.
To specify the elements of the orbit, drag off the Elements pin and select Make Classic Elements. From there, the six Keplerian elements can be set to any value. Additionally, the planet being orbited can be set (although the Earth as the default will be kept).

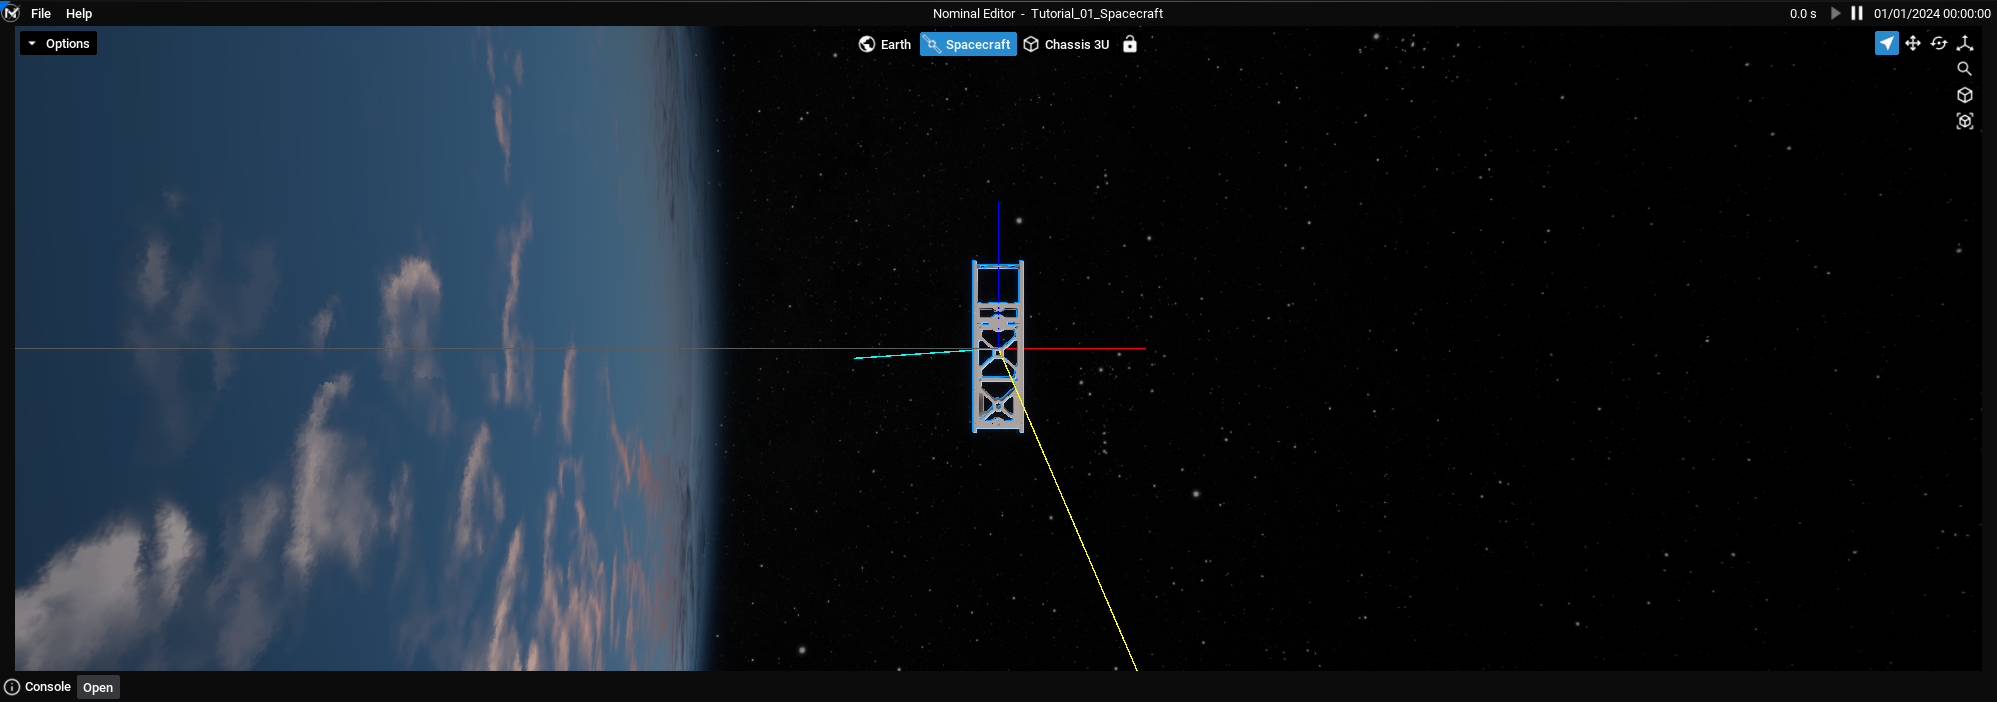
Visualizing the Spacecraft
Once the create spacecraft function has been called in the Event Graph after the universe is configured, the level can be played. Because the simulation has not been executed or run, the visualization will show the spacecraft but it will not appear to be moving. This is expected and the simulation running will be shown later in this tutorial.
Note
If you still don’t see the spacecraft, double-check that the Configure Spacecraft function is added to the event graph and is called after the Configure Universe function is called.