Data Downlink: Receiving Messages
Creating a Message
For the message key, a new message of the correct type must be made for the message to be read by the ground station. This should be done once and before the first tick. Create a function called Configure Messages and using the Create Message blueprint function, create each of the two messages and then save them as variables.
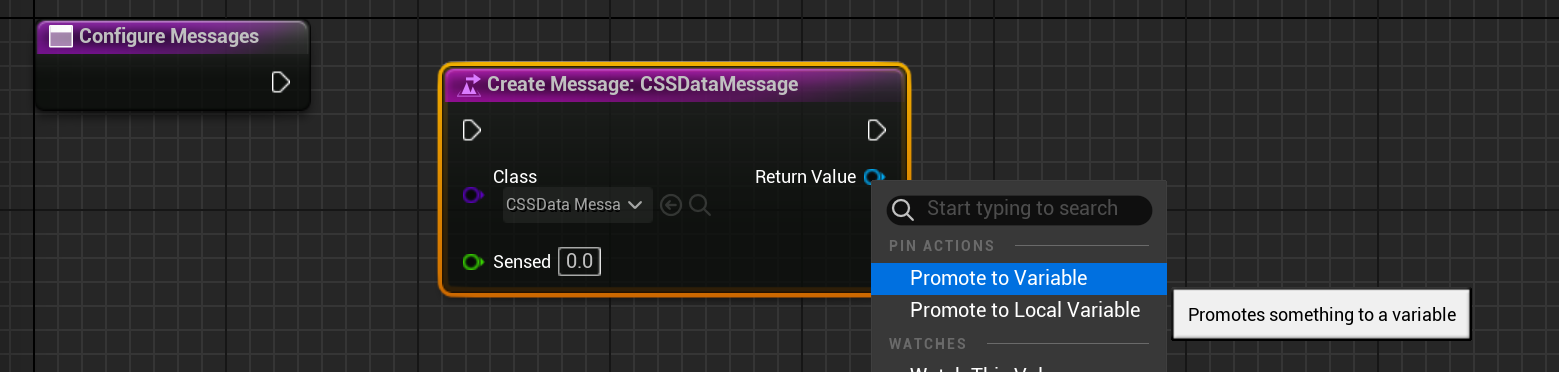
The CSSDataMessage and the GyroscopeDataMessage messages must be created. The default values can be left as they stand.

Note
Each message will have a different payload, depending on the message type. These are structures and can be used to initialize a message. Since the message will be immediately overridden by the data from the TT&C system, leaving this as default is sufficient.
The function can be added before the configure UI function on the event graph.

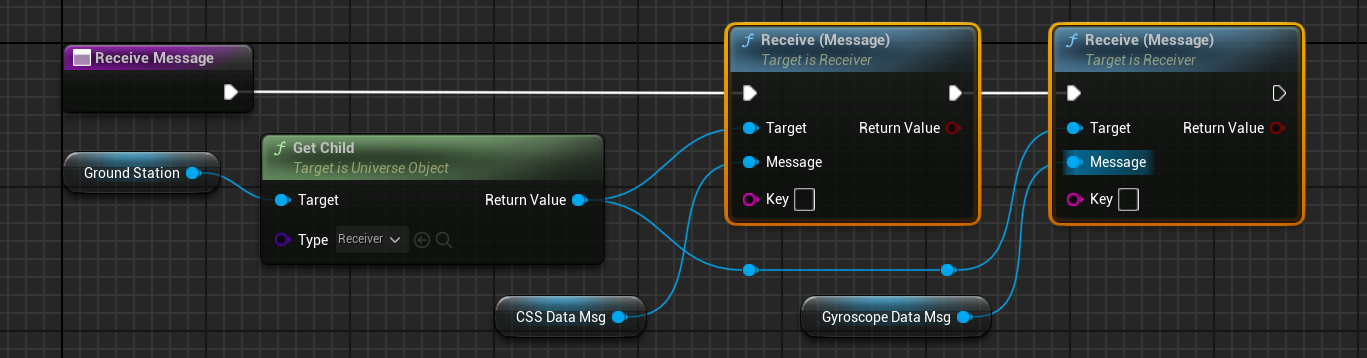
Receiving a Message
Similar to the transmitter, the receiver has a Receive (Message) function that can overwrite a message passed in with the new data from the telemetry system. The message passed into the function must be of the same type as the message to be overridden. Additionally, the key can be added to ensure the correct message is found. The recent flag will specify if the most recent message should be returned. If the flag is disabled, the oldest message will be read from the TT&C system and the data will be replaced with that. This will also return whether the message was successful.
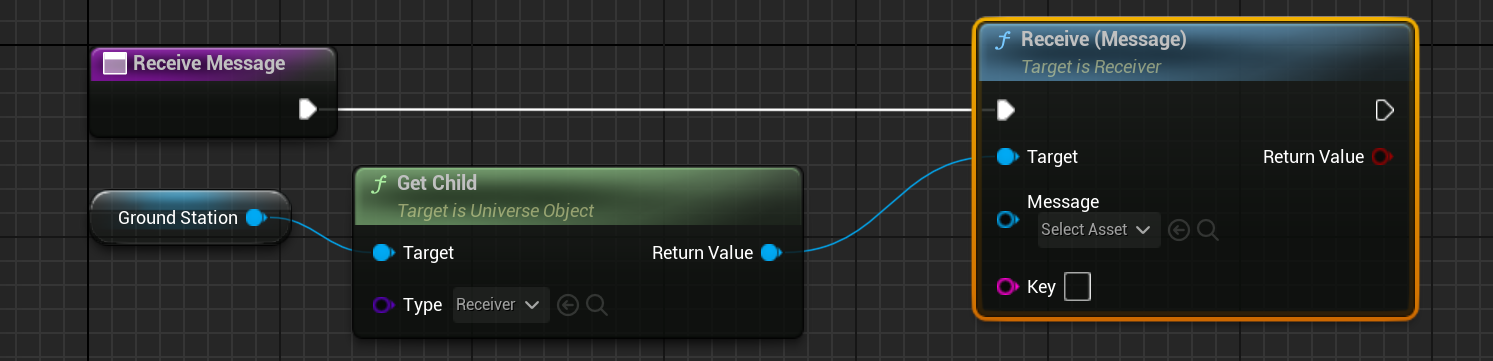
For this tutorial, a new Gyroscope and CSS messages must be passed into the Message parameter for this function.
Checking the Simulation
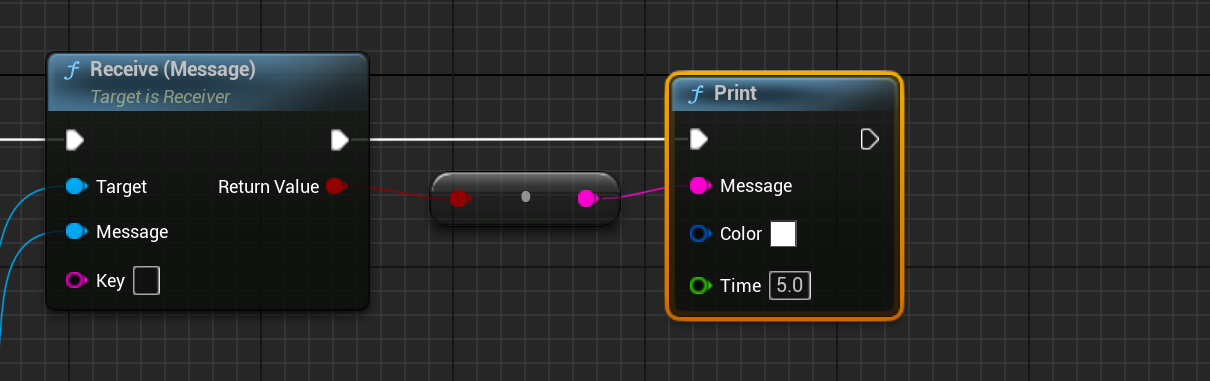
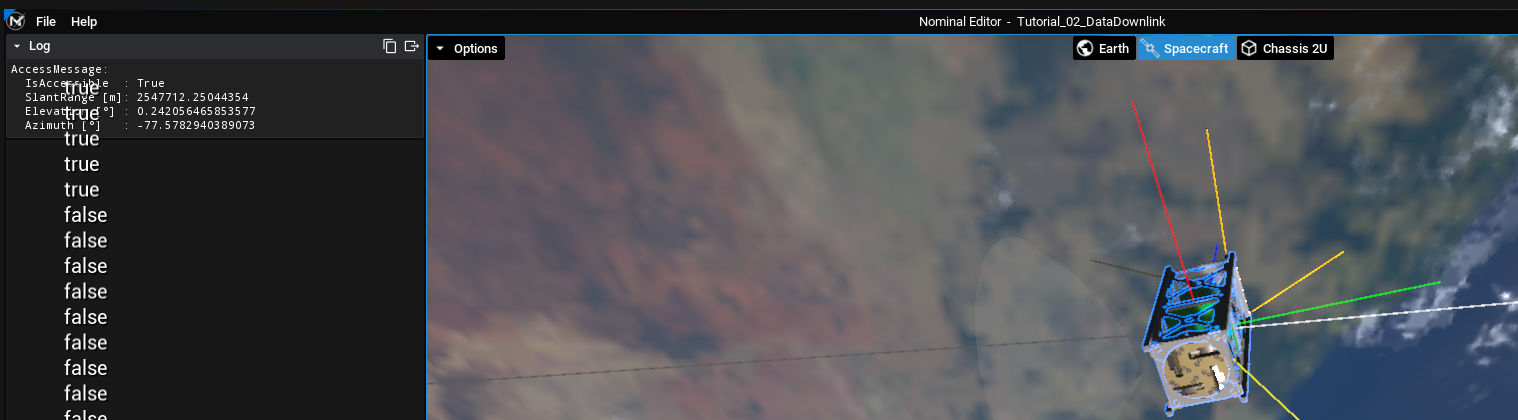
Throughout the development of a simulation, it is good practice to constantly play the simulation and see if particular features are working as expected. For example, in this case, we can check to see if the messages are being received once the spacecraft is in range of the ground station. To do this, the Print function is useful for displaying information. Here, we can print the result of the return value from the Receive Message function to see if any messages existed and if the message was correctly overridden.
Note
The Print function is a custom Nominal Systems function that prints to the screen and adds information to the console log. The standard Unreal Print function can also be used.
Printing to the screen will display the text in the top-right of the screen. It will look messy with the user interface underneath but is useful for debugging. As seen in the screenshot below, the flag changes to true when the spacecraft is in range of the ground station.
Plotting Data
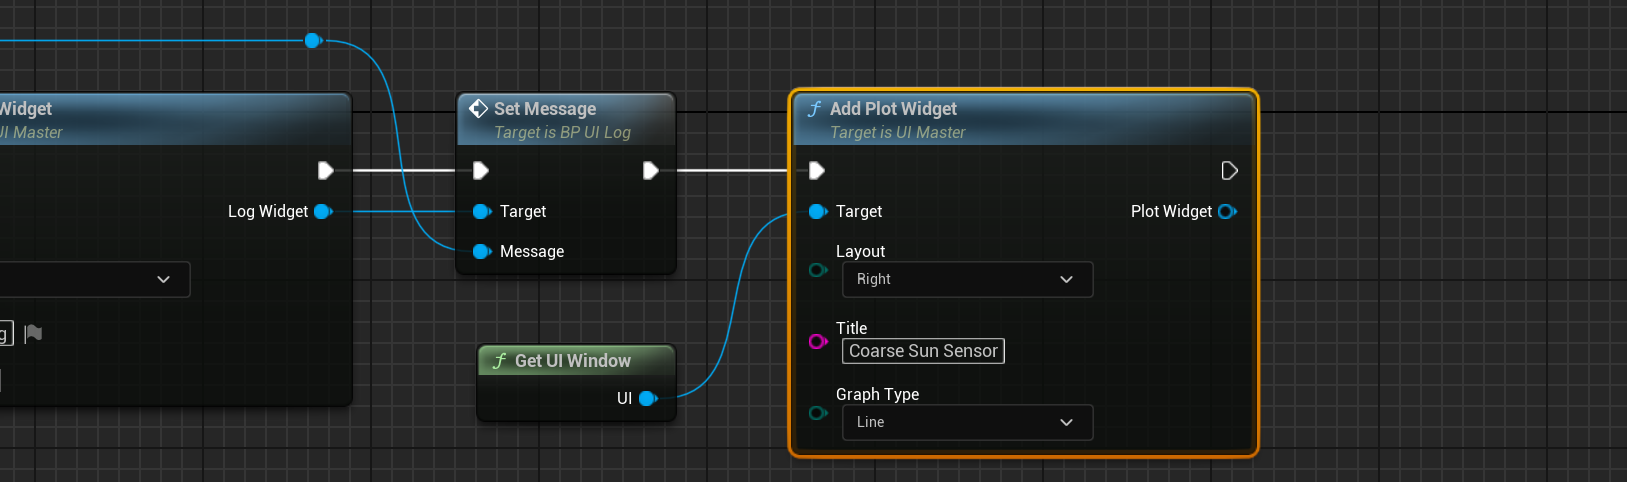
For this message, the data should be plotted, when it was received by the ground station on a graph. This will be for the CSS data message and it will show the data on the plot. Firstly, a new plot needs to be added to the user interface. This will be done using the Add Plot Widget on the UI window, in the configure UI function.
Note
Adding widgets should only be done on the Begin Play event and not be handled on a simulation tick.
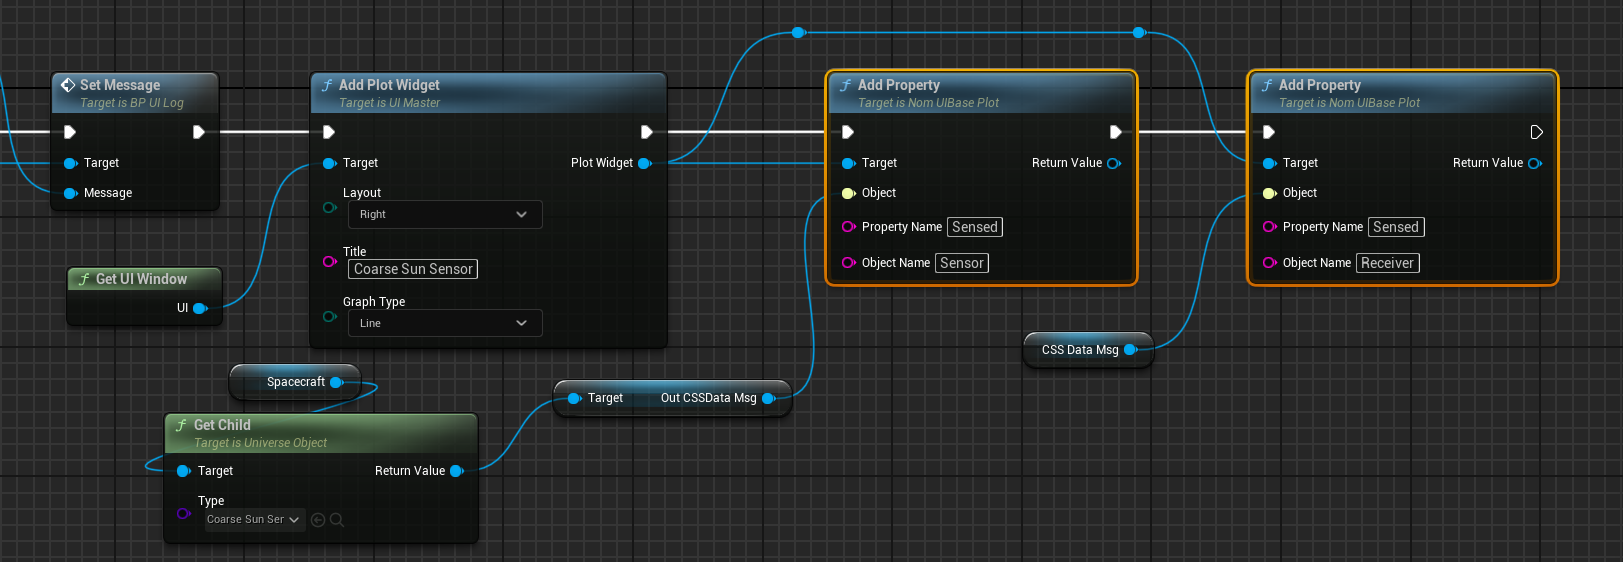
Then, the property needs to be added to the plot which will plot the Sensed value from the coarse sun sensor (and the value received on the network) to the plots. This is done using the ‘Add Property’ function and doing it for both the coarse sun sensors’ output message and the newly created CSS Data Message used for the receiver.
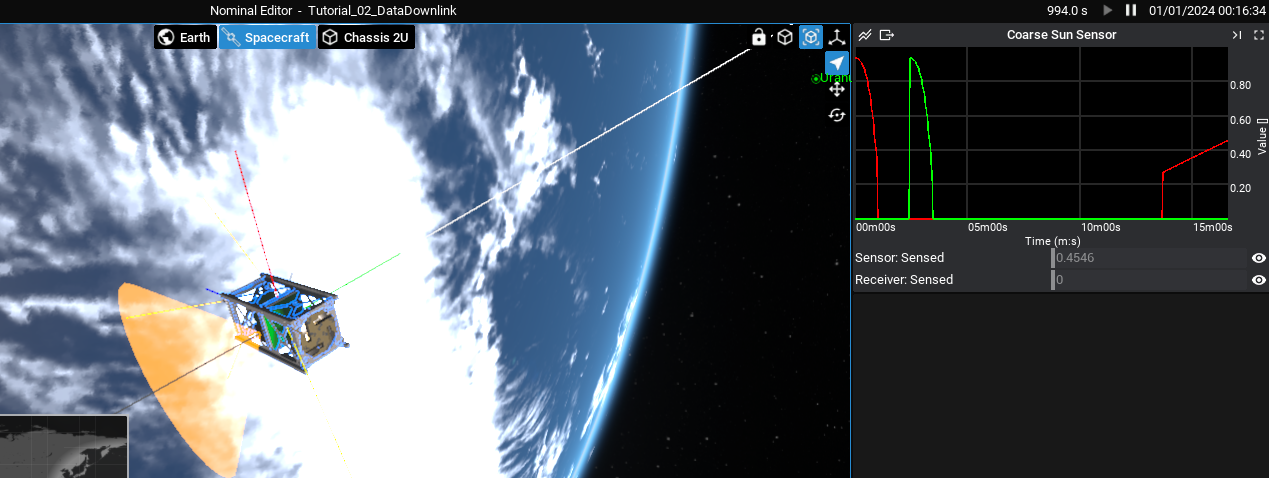
The graph will show a 150-second delay between the two data points. This is because the spacecraft takes 150 seconds before it reaches the access of the ground station. Additionally, the data is cut off when the spacecraft is out of range from the ground station again.
Note
By default, plots will show the last 10 minutes (60 seconds) of data. To switch to the ‘all data’ view, press the expand button at the top-right of the plot widget. This will then show all time over the plot history. To zoom into the plot, use the CTRL key and the scroll-wheel on the mouse to change the plot's X-axis range.