Spacecraft: Configuring Components
Adding a Chassis
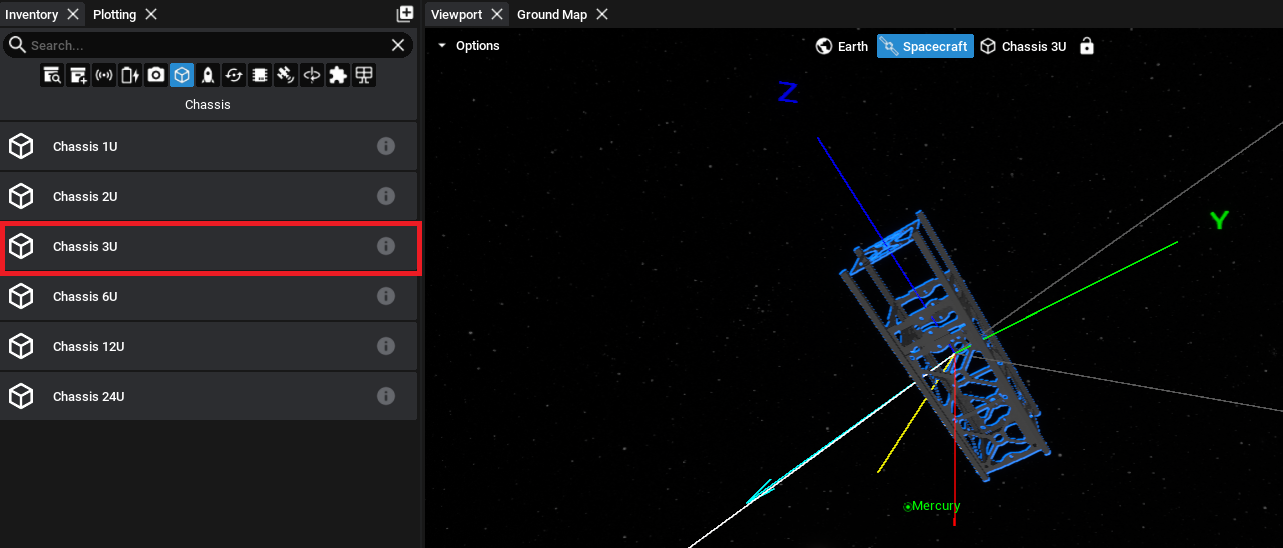
For every spacecraft, components must be added to a chassis. A chassis is a standard frame that can be used to house the components of a spacecraft. The inventory will not allow for other components to be added to the spacecraft until a chassis is added. Currently, only cube-sat models have been provided with Nominal Editor. Select a chassis option from the inventory list to assign it to the spacecraft.
Adding a Solar Panel
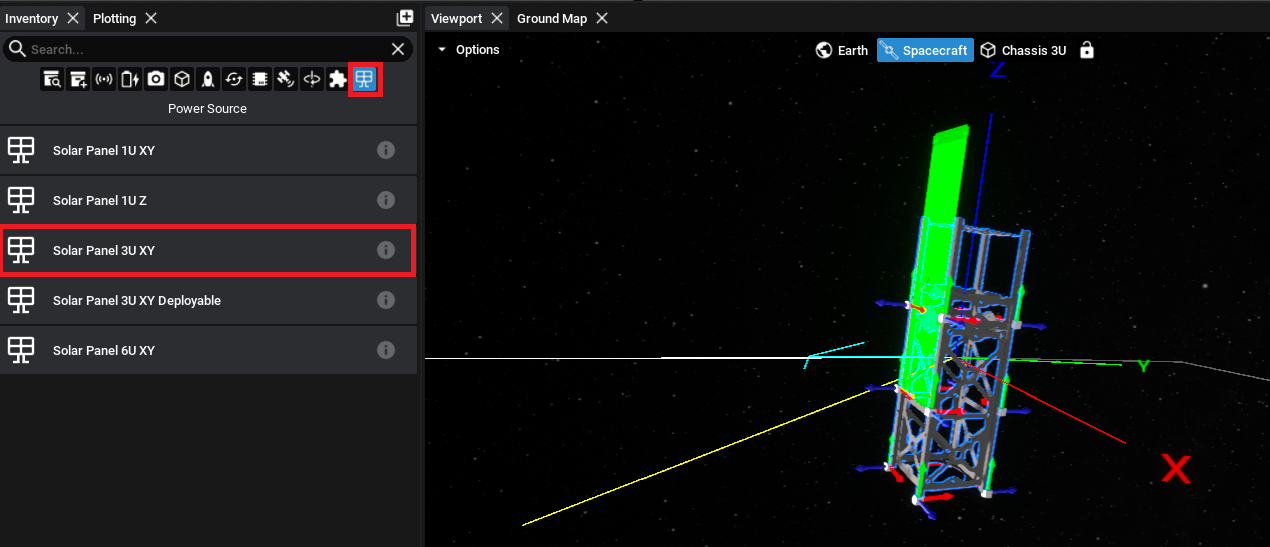
A solar panel can be added to the spacecraft by selecting the solar panel tab and choosing the appropriate sized solar panel. In this case, since the 3U chassis is selected, to put a solar panel on one side, select the 3U solar panel.
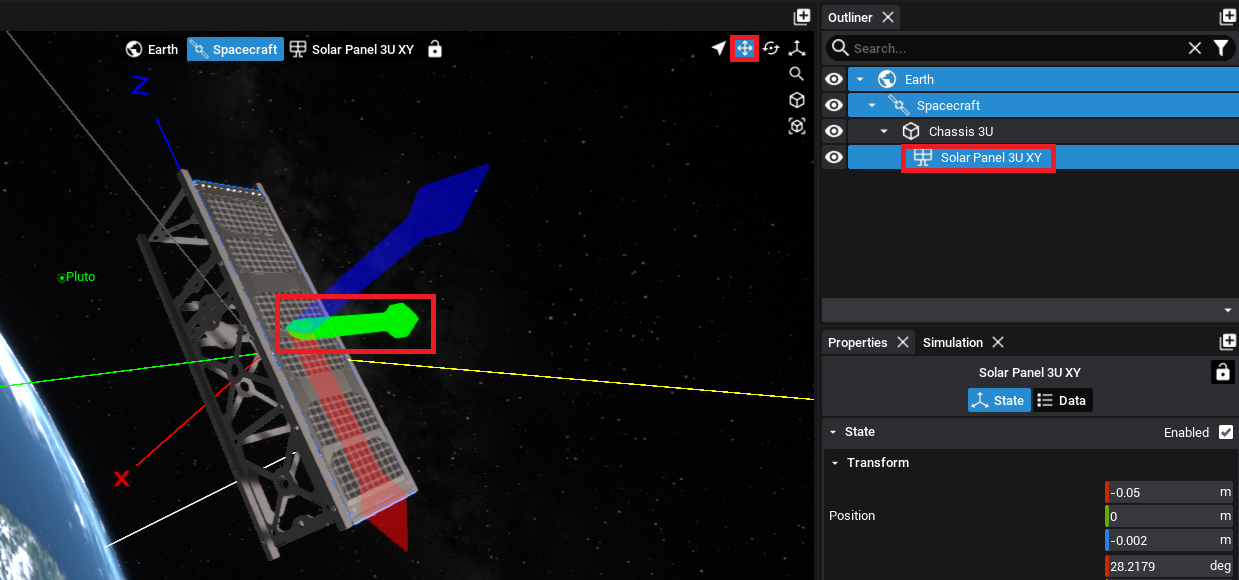
For any non-chassis component, once the object is selected, the viewport will show an outline of the component that can be moved around the scene. To snap the component in place, find the correct socket that the component should be attached to and then click the left mouse key down.
To adjust the position of a component once it has already been added, select the position gizmo in the top-right of the viewport. Then, using the three arrows on the viewport, click and drag to move the component into place. The cursor icon can be clicked to return back to the standard control scheme.
Note
Alternatively, the component position and rotation can be set by selecting the component and changing the position in the Transform section of the State tab in the properties panel.
Adding a Reaction Wheel Stack
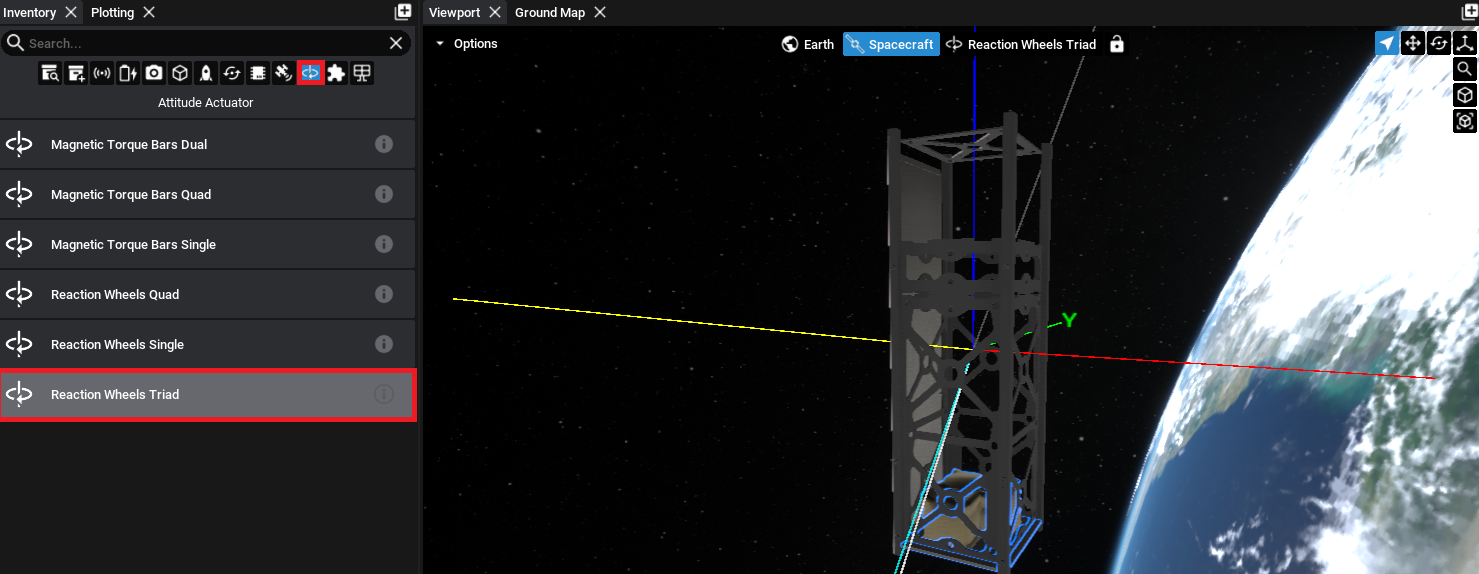
Spacecraft can orient themselves in a particular direction in space by using changes in momentum. Reaction wheels help spacecraft adjust their direction by spinning internal wheels, causing the spacecraft to rotate in the opposite direction. This lets the spacecraft steer or stabilize itself without using rocket fuel. Studio provides a couple of reaction wheel options that can be added to the spacecraft that have a preconfigured number of wheels. Select the Reaction Wheels Triad option to add the three internal reaction wheels.
Warning
Avoid adding multiple reaction wheel sets to the spacecraft as this can cause undesirable tumbling and should not be required. A single three-axis reaction wheel array will be sufficient to produce the relevant torques require to achieve pointing.
Adding a Computer
The Guidance Computer is a ‘smart’ component that can detect the components on the spacecraft and enable flight software pointing based on the components that exist. Add the Guidance Computer to the chassis.
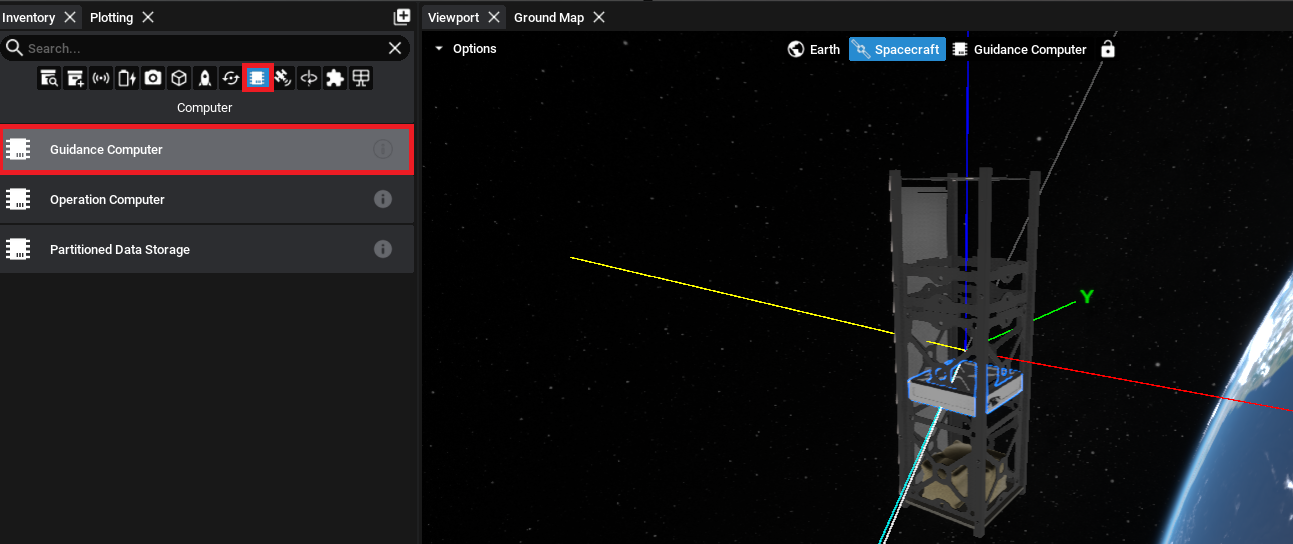
Note
The guidance computer will require reaction wheels to be added to the spacecraft. If the computer was added before the reaction wheels, a warning will appear on the screen suggesting that a reaction wheel array is added to the spacecraft.
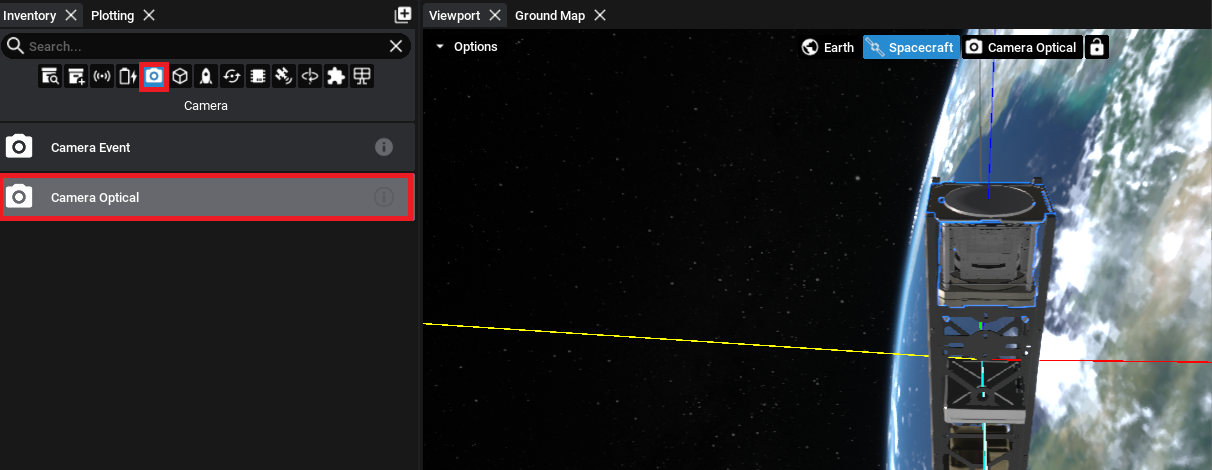
Adding a Camera
A camera can be added to the spacecraft to capture satellite imagery. The camera must be positioned to be facing out of the chassis to ensure the spacecraft components do not get in the shot. For this tutorial, the Optical Camera is used.
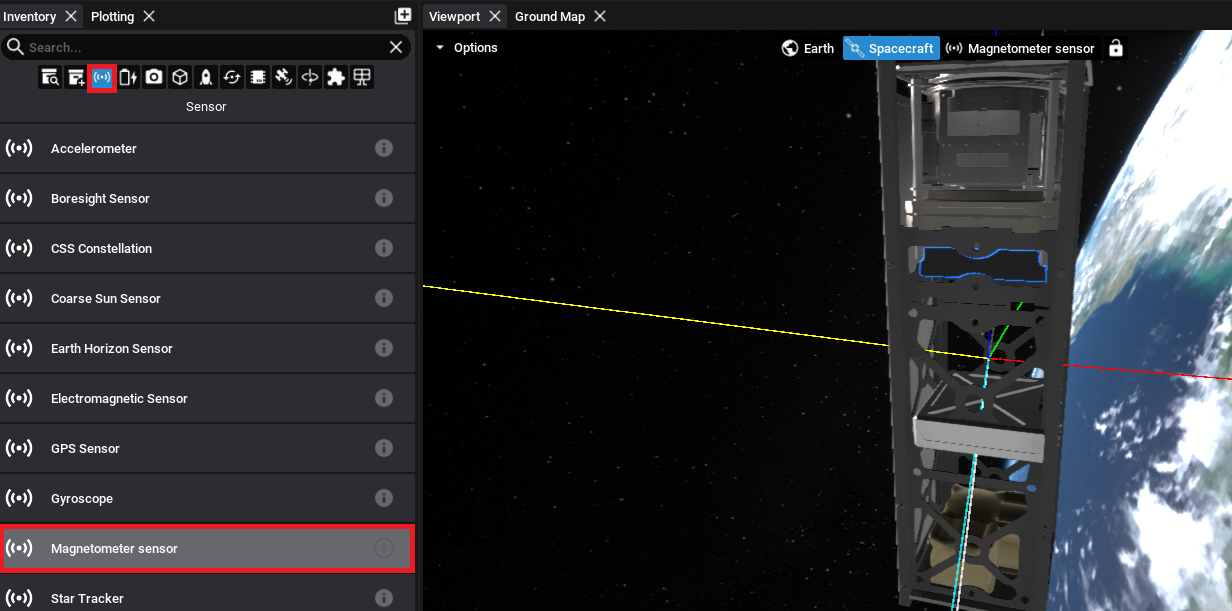
Adding a Magnetometer
The last component to add is a sensor. The magnetometer can detect the presence of a magnetic field, provided it is added, and record the readings relative to its orientation. This can be added from the sensors tab.
Warning
Magnetic fields on the Earth are not enabled by default. The next tutorial document will show how to enable the magnetic field on the planet.