Spacecraft: Configuring Events
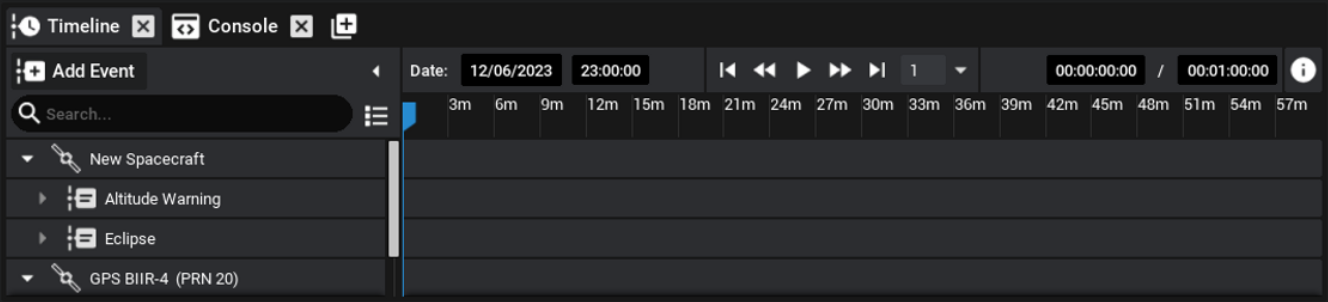
The Timeline
The Timeline, located under the viewport, contains a summary of all events that will or have happened throughout the simulation. Some events are automatic, such as eclipse and altitude warnings. Others can be specified through the Events System, including timers that will always appear in the timeline, and flags that have markers that appear when they are triggered. The timeline can be panned and zoomed and provides an easy place to specify the epoch and simulation speed.
Configuring Events
Currently, the spacecraft can orbit the Earth but does not have any functionality. To add some events to the spacecraft, select the spacecraft and go to the Events Tab in the Properties Panel. Click Add Event and configure it as shown.
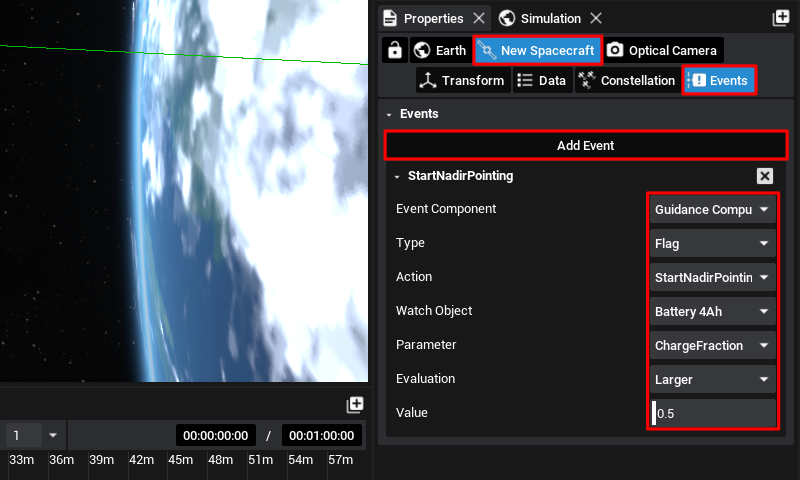
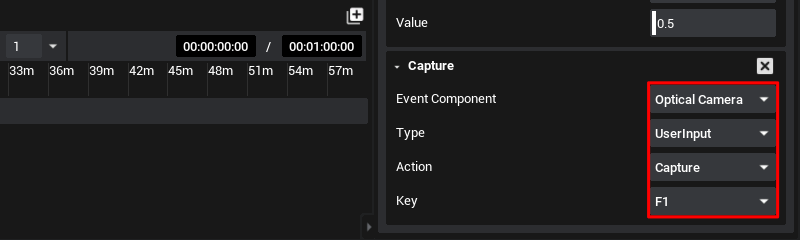
This is creating a new event that will run on the Guidance Computer. The Type ‘Flag’ means it will watch a value and react to it. The Action is the function to run when the flag is triggered, which in this case is to start pointing at Earth. The other parameter is the Flags evaluation, it is watching the battery for when the charge fraction goes above half before switching away from sun pointing mode. Add one more event and point it at the Optical Camera. Use Type ‘UserInput’ and run ‘Capture’ on the key press of your choice.
Note
Each component has its series of available events. Custom components can have additional events that are defined in the blueprints when exported.
When simulating, by pressing this key on the keyboard, the event will be triggered and an image will be taken from the camera.