Editor: Displaying Star Constellations
Description
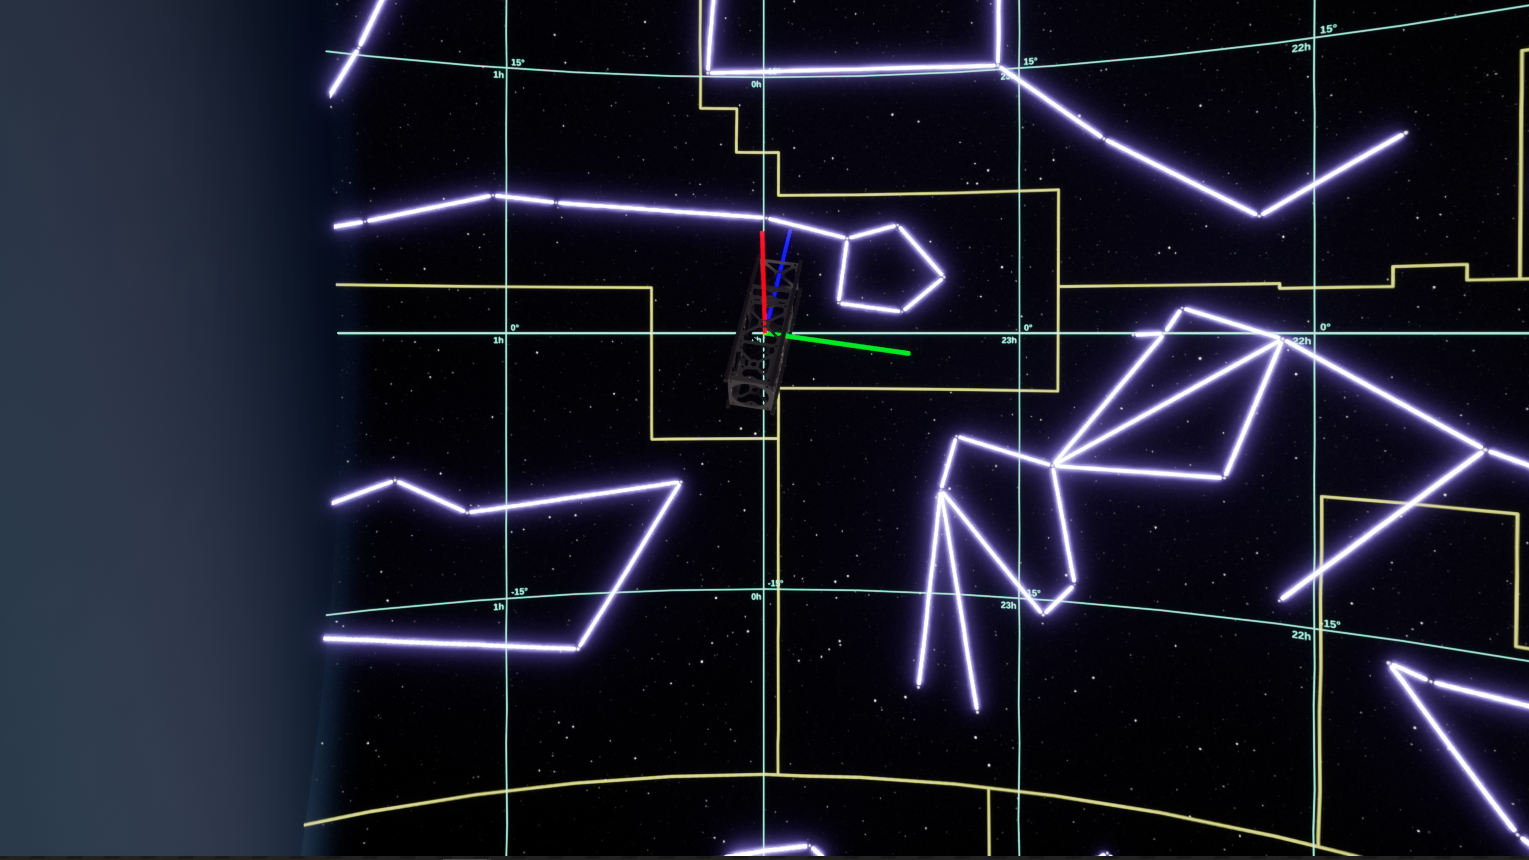
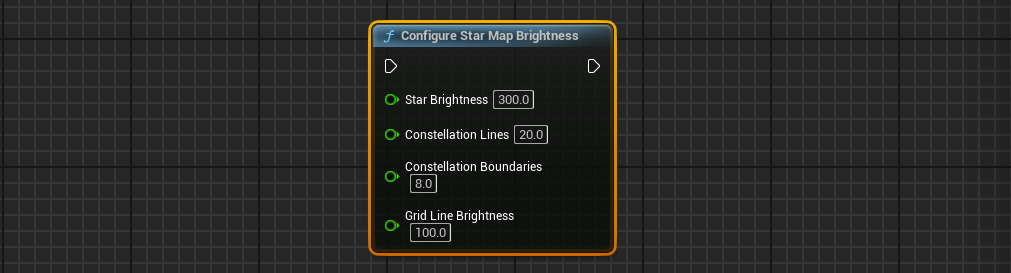
The stars in the background in the simulation are purely for visual purposes and can be configured to have more functionality. It is controlled through the BP_Stars blueprint and the following can be configured as seen in the image below:
- Brightness and colour of constellation lines (purple)
- Brightness and colour of the grid (green)
- Brightness and colour of constellation boundaries (yellow)
- Brightness of stars
An example star map with some modified colour can be seen below:
Updating the Star Parameters.
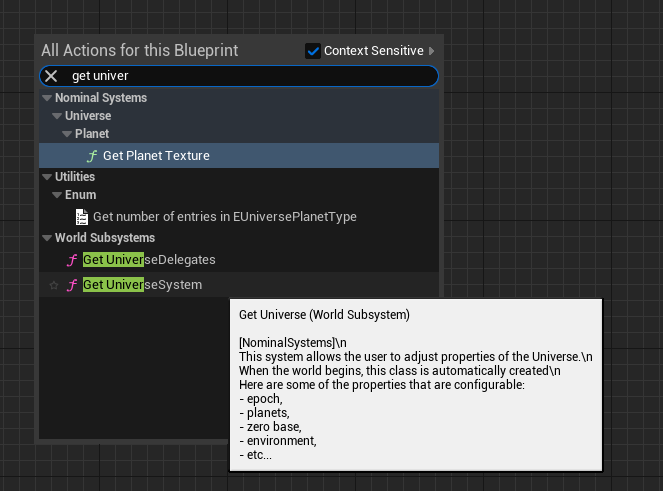
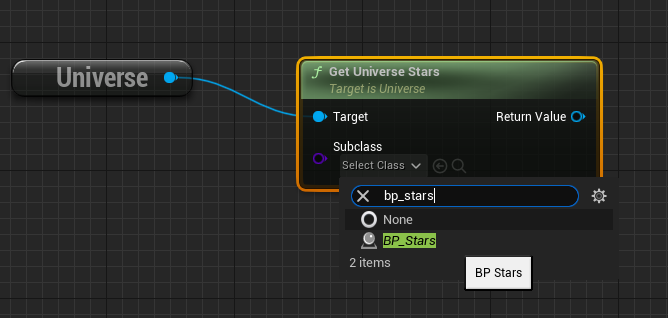
Open a blueprint and call Get UniverseSubsystem. This is the subsystem that controls all space and celestial objects, including the high-resolution star map.
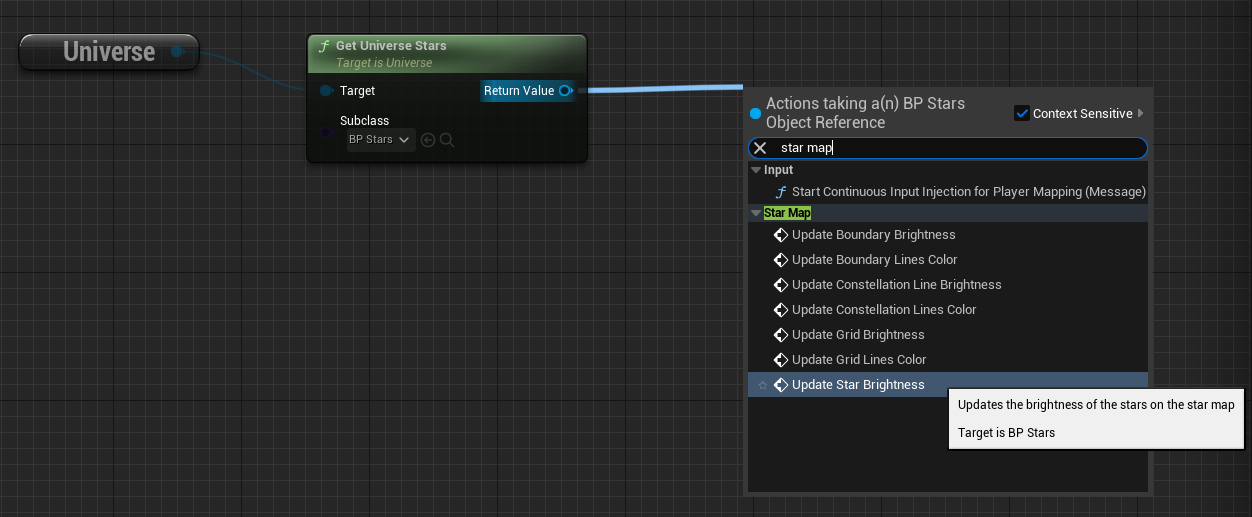
Drag off the universe and call Get Universe Stars. This will give you a reference to the BP_Stars actor in the scene.
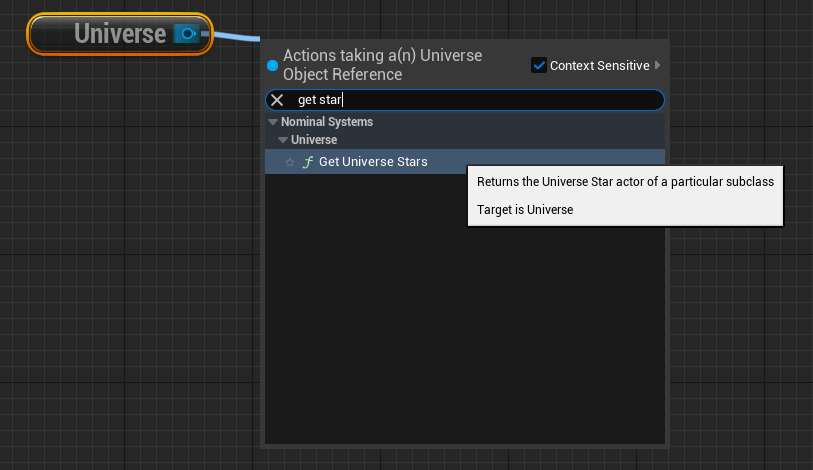
Next, set the subclass in Get Universe Stars to BP_Stars.
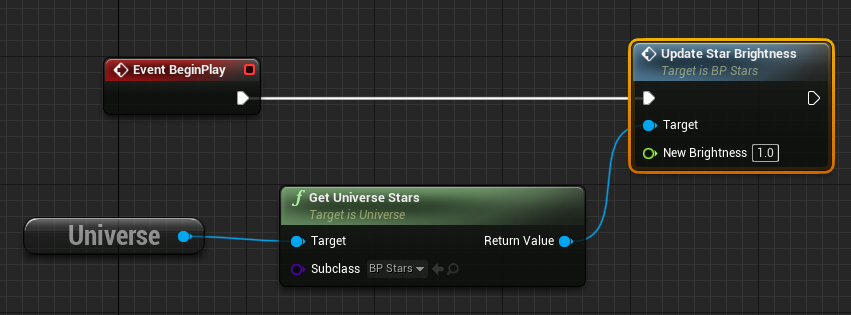
Then, drag off the Return Value off of the Get Universe Stars function and call Update Star Brightness. You can search Star to find the Star Map functions relating to its configuration.
Finally, set the New Brightness to 1.0 and call it on the BeginPlay. The functions can be called anytime but you do not on every frame.
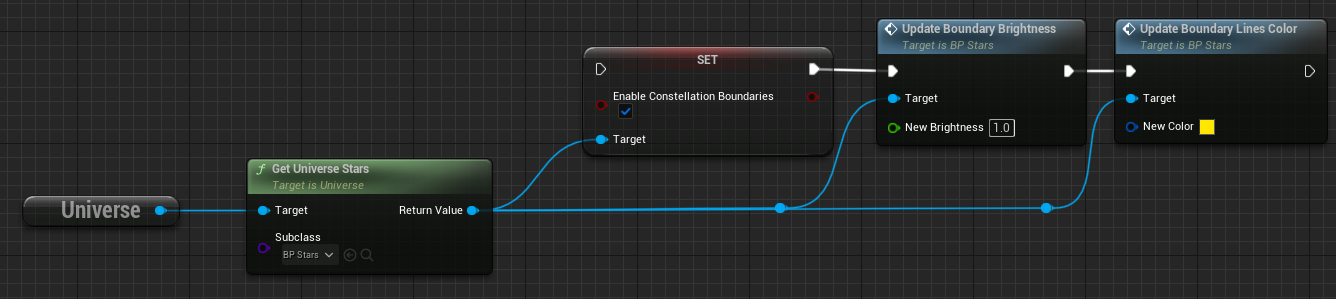
To modify the other values, such as grid lines, other functions can be called from the drop-down. For the grid, constellation boundary and constellation lines, you will also need to set the enabled variable on the BP_Stars to true to have them activated.
Alternatively, the star brightness of each property in a single function by calling the Configure Star Map static function. This works on any level that has been configured with the correct observer. Putting a value of 0 on any of these values will disable them from being shown.
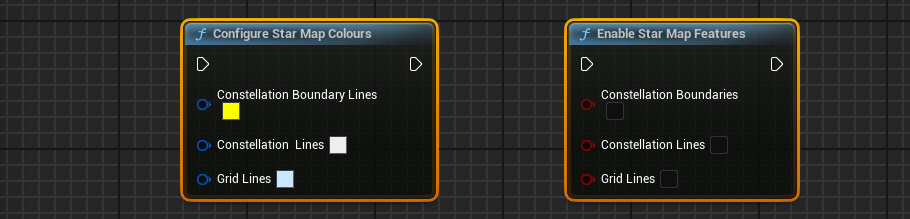
Similarly, a function called Configure Star Map Colours can be used to set the colour of all the lines and a function called Enable Star Map Features will enable or disable the features.