Editor: Scripting a System Test
Description
As we build simulations, we need to ensure our simulations are acting the way we expect them to. This operator guide will go through how to create a System Test using the software and Nominals’ provided testing functions. This will all be built upon the provided Demo_AttitudeFeedbackBasic and test that the Pointing Error is zero after some time.
Creating an Assert
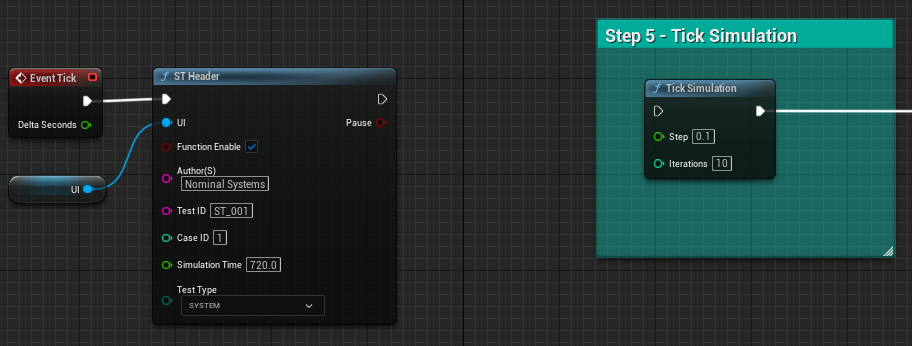
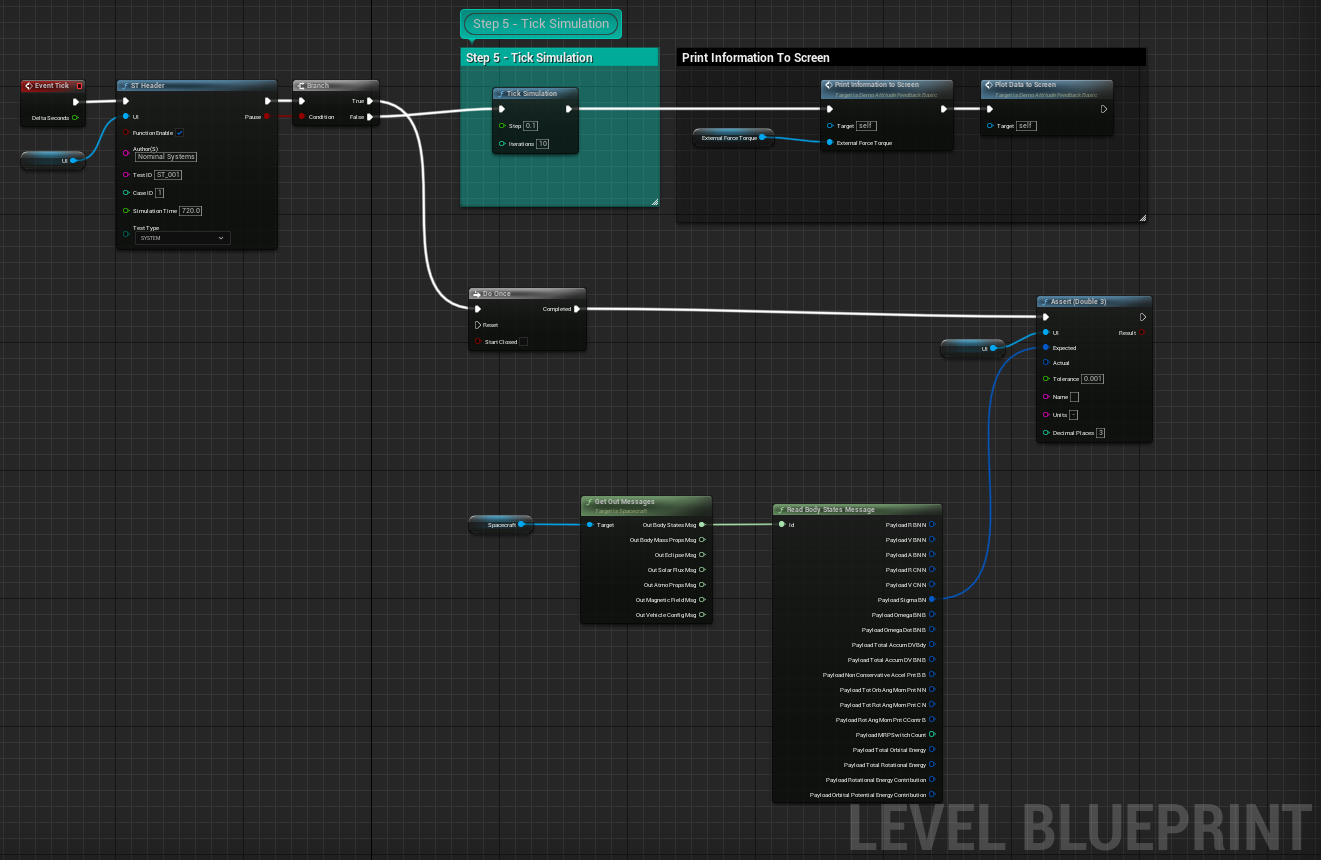
An assert is a forced check that validates whether the data in a simulation or scenario is correct and accurate. As an example, to create an assert, open up the Level Blueprint of the demo level or scenario file. Before the tick simulation, create an ST Header node and put the value of the user interface into the UI parameter. Make sure to leave the function calls after Tick Simulation is connected.
The ST Header function will create a preset UI in the middle showing some basic information. This is optional and can be replaced by a custom function. The simulation time parameter tells how long the test should run. If the simulation time is less, the function will return false, otherwise, it’ll be positive.
Note
ST stands for system test. A system test is a type of comprehensive test that validates that all components tested together are correct and produce an expected result.
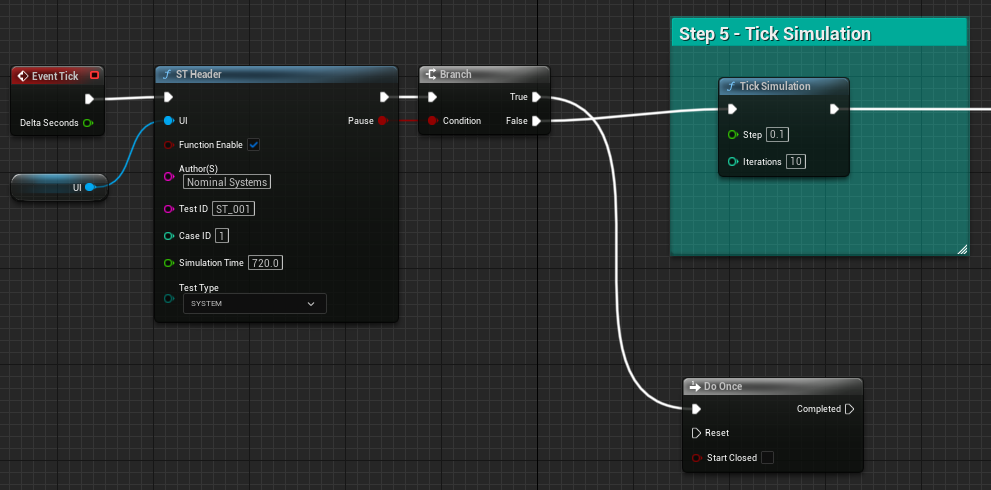
After the ST Header, create a Branch node and have the Pause bool be the input for it. Connect the True pin to a Do Once node and the False **pin to the Tick Simulation. The functionality we just added will have the simulation pause after 720 seconds of runtime and call the Do Once node where we will put the asserts. This is how we make sure to assert only once after the simulation has ended.
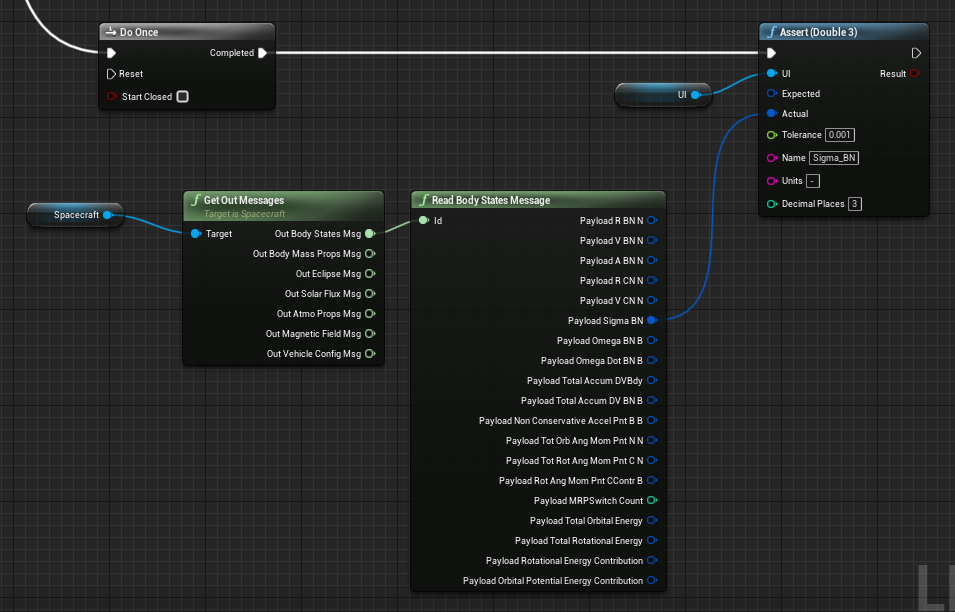
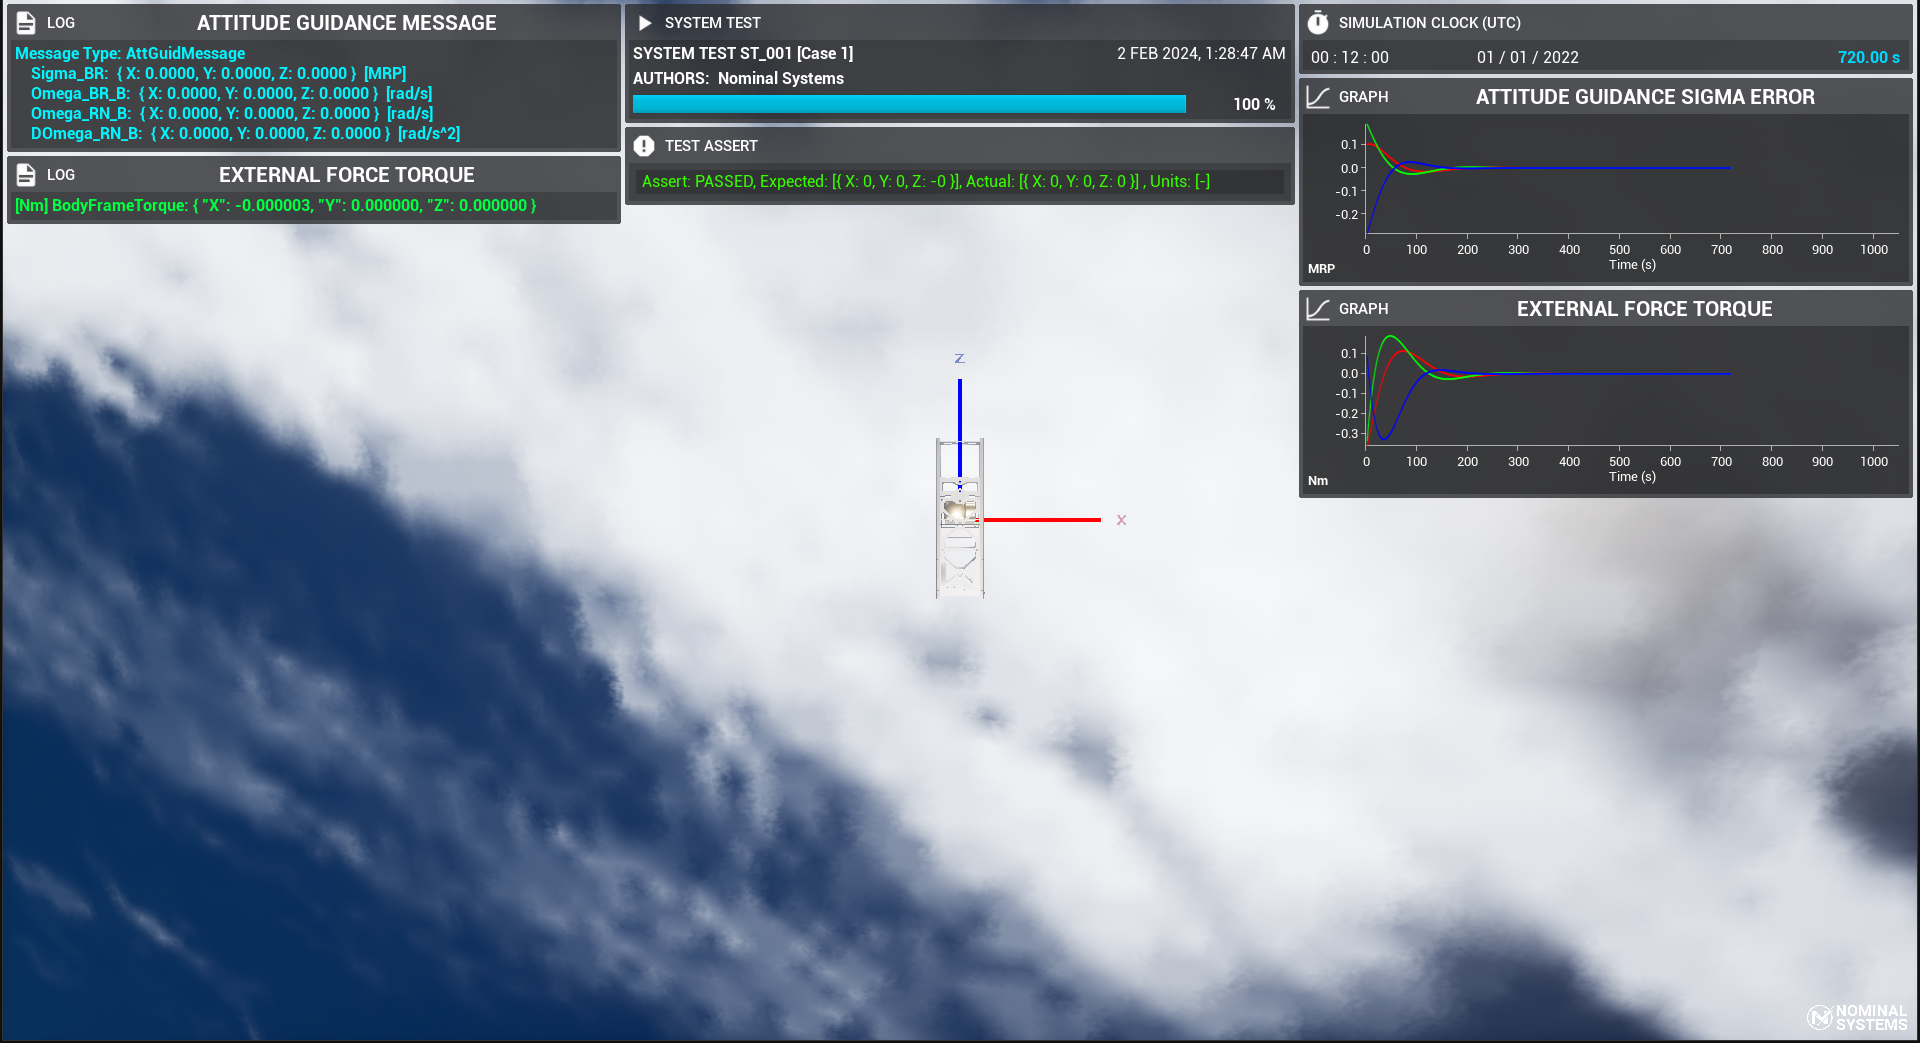
Create an Assert(Double 3) node and input the spacecraft’s Sigma BN value in its Body States Message into the Actual parameter. The Expected parameter can be left blank for a zero Double3. Lastly, put the user interface into the correct UI parameter. The Assert(Double 3) node will return true if the Actual value is within a tolerance of the Expected value. It will also create a UI message in the middle. The final result for the level blueprint will look like this:
The assert functionality is done. Hit play and let it run to the end and it will show the asserts passing in the middle of the screen.