Editor: Configuring a Solar Panel and Battery
Description
This guide will show how to configure a very basic power circuit - one that connects a solar panel with a battery and can charge the battery over time. By default, solar panels will not be able to charge batteries but will produce a power output from the amount of solar flux detected over the surface of the panel. This guide will show how to add solar panels to a spacecraft, create a power bus and connect the two devices. The tutorial will not cover the flight software chain for pointing at the sun.
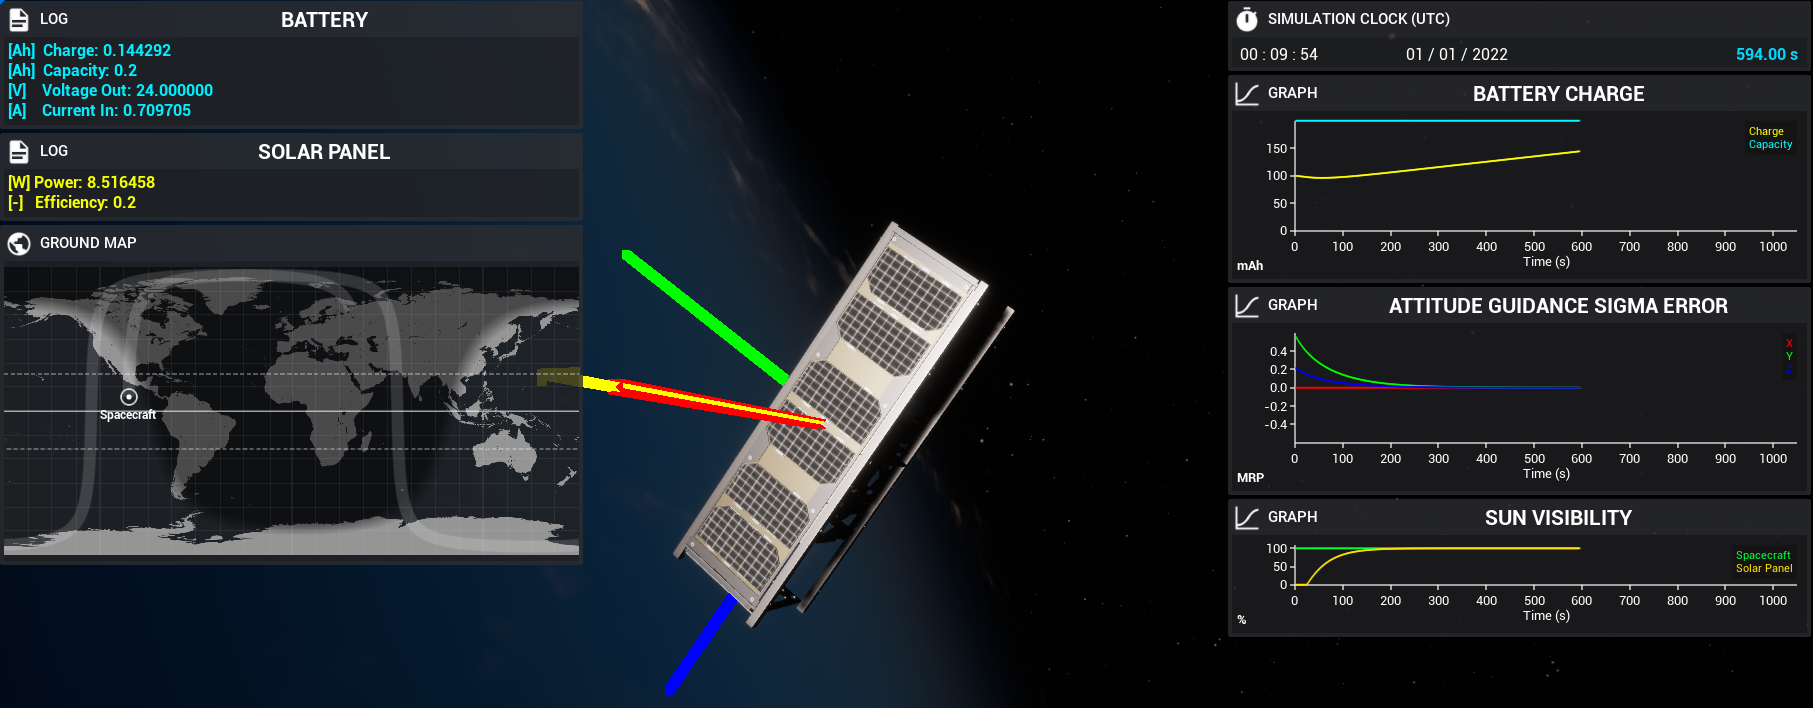
The demo level Power/Demo_SunPointing uses these components, along with a sun-pointing software chain, to direct the solar-panel face of the spacecraft towards the sun and charge up a battery on a simple circuit.
Creating the Spacecraft
When adding the two components, there are two ways of adding them to the spacecraft. The first is via the spacecraft blueprint editor and the second is via spawning them in the level blueprint. This tutorial will assume that the user is configuring them in the blueprint editor. However, the implementation and setting of custom power variables should be the same regardless of which implementation is used. Both a Battery and a Solar Panel (of some kind) need to be added to the spacecraft. The BP_Spacecraft_Basic_3U spacecraft has been set up with both a 30x10 cm solar panel and a 1Ah battery. These values can be adjusted by clicking on the solar panel child actor class on the components list:
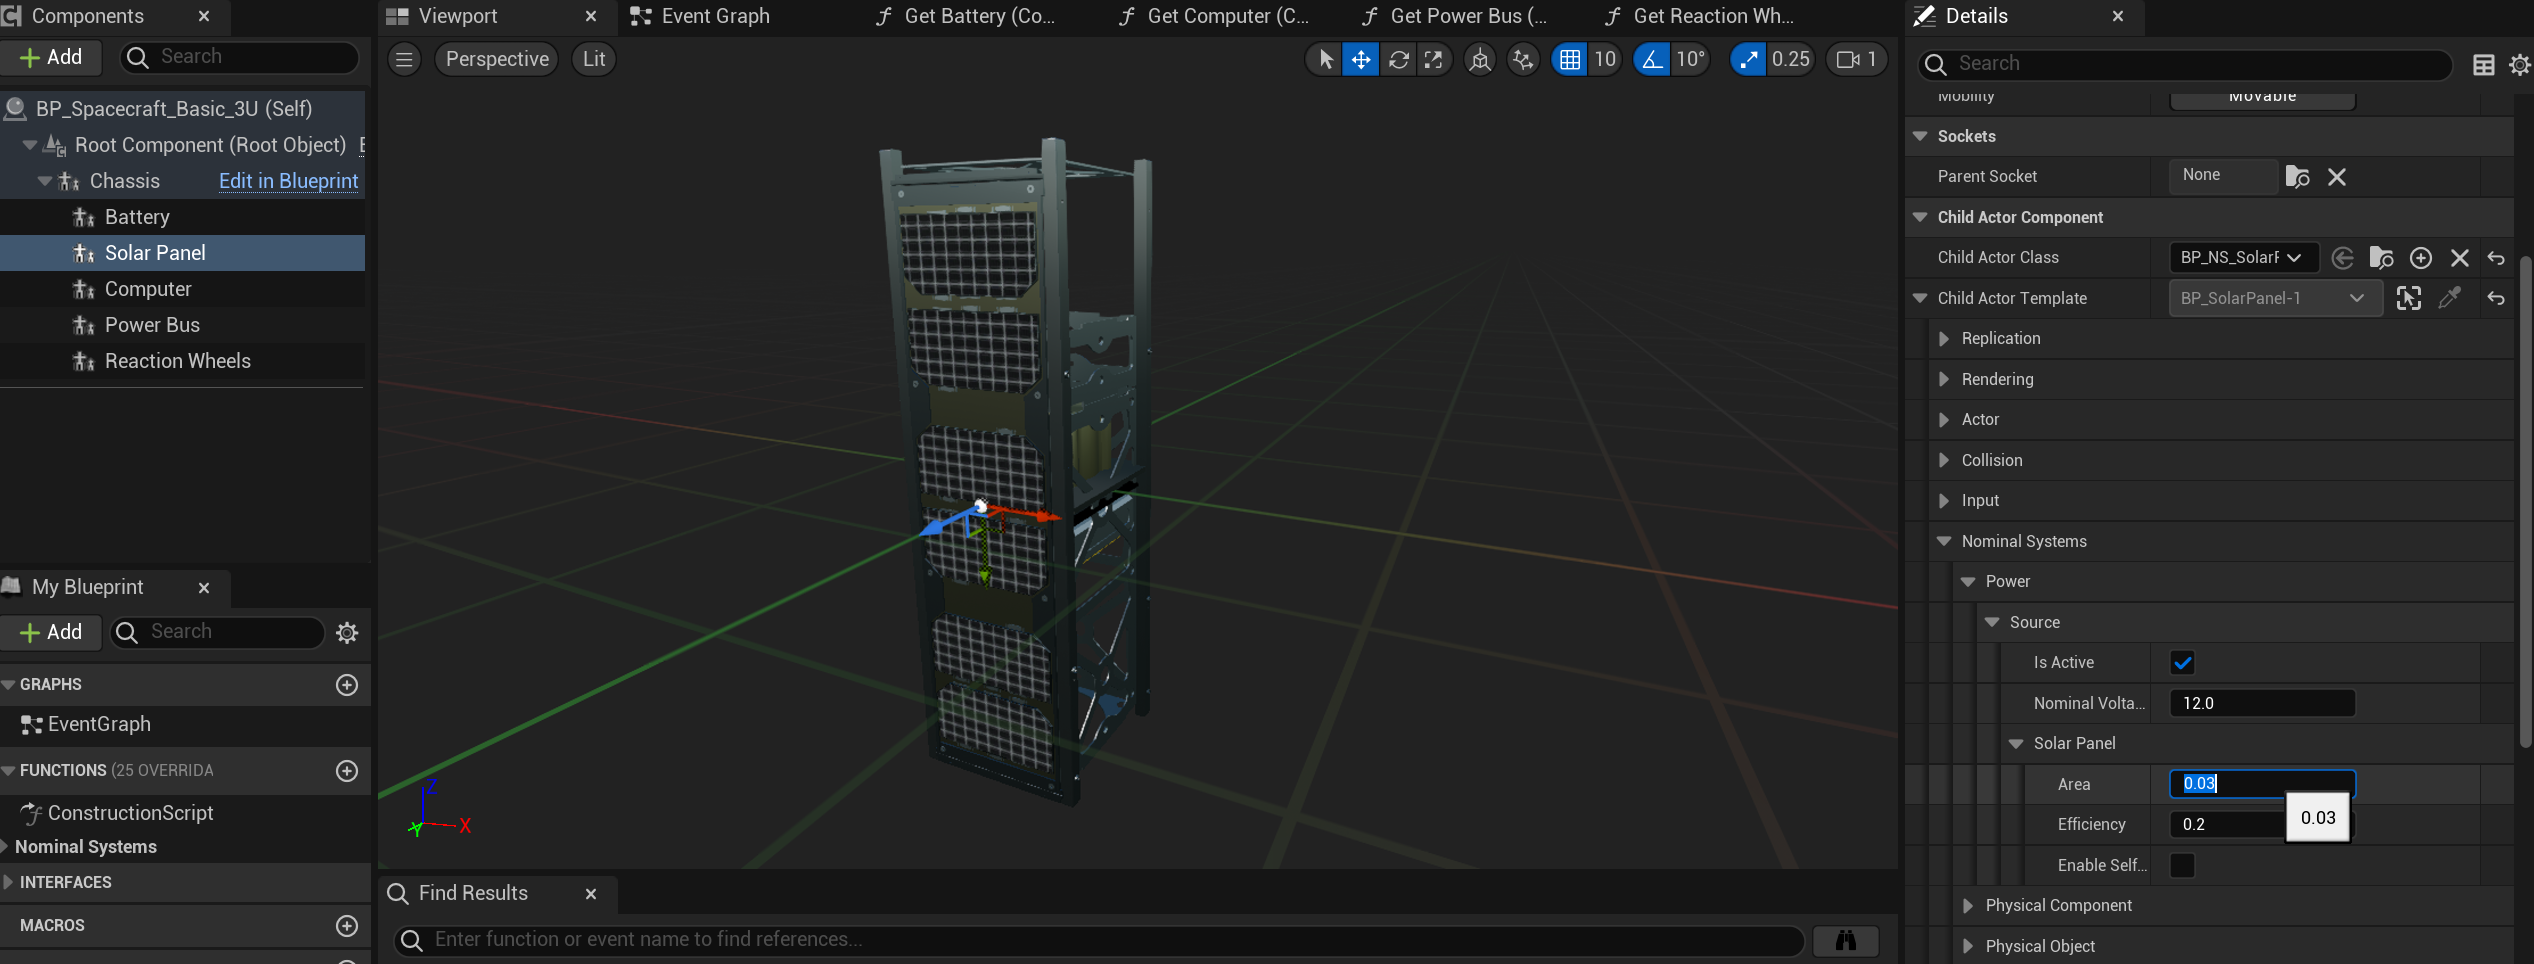
For the solar panel, the area defines the total area of the panel in square meters (which may look small) and the efficiency describes the efficiency of the panel as a fraction, where \(0\) would be completely inefficient. A 20-30% efficiency value is realistic.
The battery is a Power Storage component and all data will be under the power storage tab of the details panel. The battery can be edited to have a particular capacity (in amp hours), charge fraction (between 0 and 1), voltage, and max and min charge rates. These values are appropriate to leave as default but can be adjusted both here and in the level blueprint. For now, this tutorial will assume all but the charge fraction will remain the same.
Note
When inheriting from the base classes for the battery, note that it is named Power Storage. The blueprint classes that are provided in the default assets will be named Battery. This naming difference is reflected in the back-end architecture of the simulation.
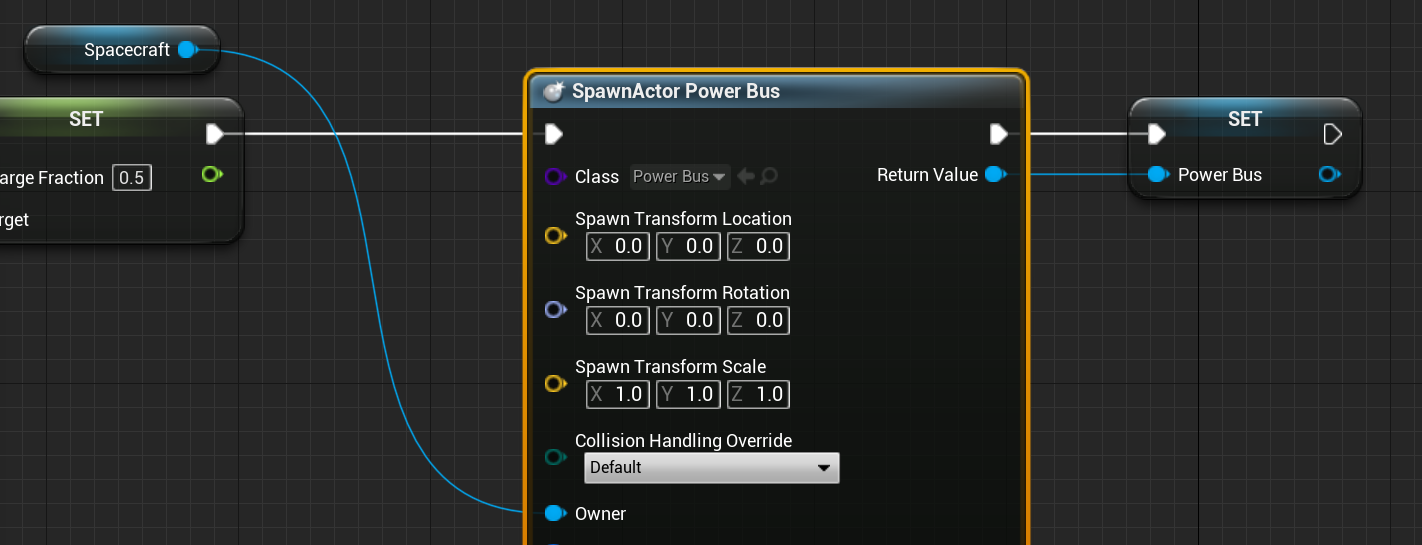
Updating the Charge Fraction
In the level blueprint, after spawning the spacecraft in the level, to update the charge fraction of a battery, grab the component from the spacecraft and set the charge fraction variable on the battery. This will immediately update it in the backend. This can be done to prove that the solar panel is powering the battery correctly over time. The charge fraction can be anywhere between 0 and 1.
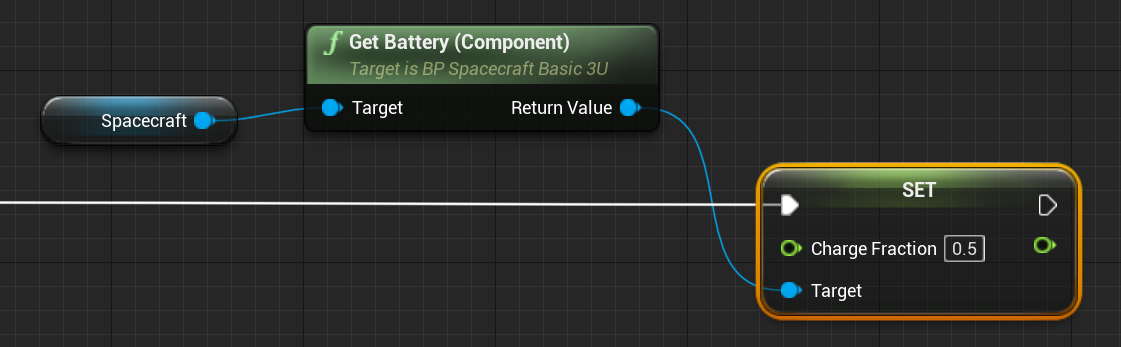
By updating the charge fraction, the total charge on the battery will be equal to the fraction multiplied by the capacity in amp-hours.
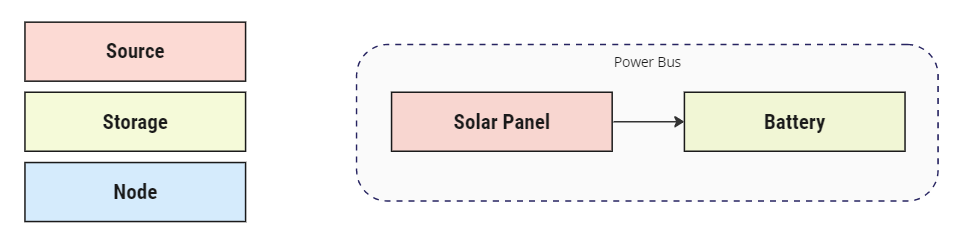
Creating a Power Bus
Central to all circuitry designs in Nominal Editor is the Power Bus module. It enables the construction of simple and complex circuits to be developed and connects the power systems. Although this example is a very simple circuit, the power bus is still required to allow the solar panel to provide the battery with new power. To create a power bus, it can be added to the spacecraft as a component in the level.
The power bus does not have any specific on-spawn variables that need to be adjusted. Make sure that the ‘Owner’ of the bus is the spacecraft that it will be attached to.
The power bus works as a simple circuit designer. It allows circuits, within reason, to be configured in both series and parallel formats. There are strict rules to what kind of circuits can be constructed on the bus, which is defined more in the technical manual documents. For this circuit, a simple connection between the solar panel and the battery needs to be designed:
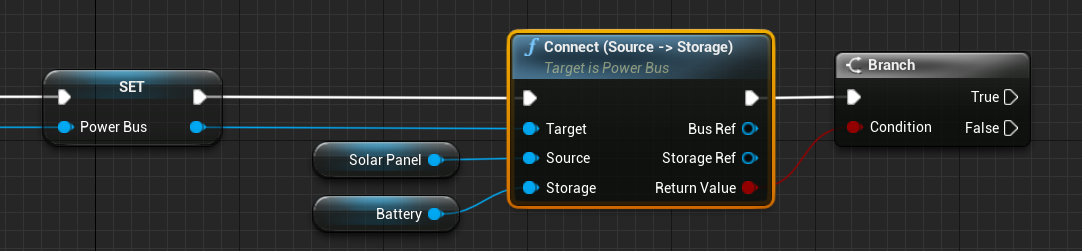
This can be done using the Connect nodes. There are four kinds of connecting methods; these depend on what is being connected and to which other connection. The first method, Connect (Storage) only needs to be used if the Battery is the only device in the circuit. It does not need to be used when connecting the Battery to another component, such as in this case.

For this case, only the Connect (Source -> Storage) method is required, connecting the solar panel (source) to the battery (storage). The connect methods also output a bus reference, node reference and a return value. The return flag will output whether the connection is valid and allowed within the circuit. The other values make it useful for constructing more complex circuits, which are not covered in this guide. The two components can be connected like so:
Reading Power Data
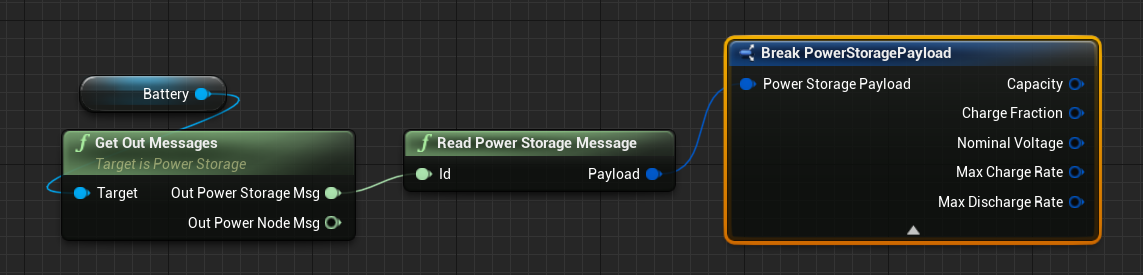
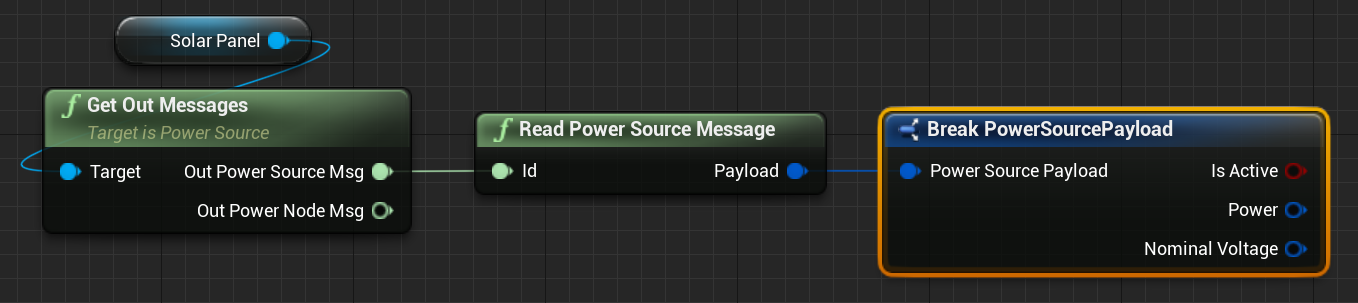
The battery has many parameters that can be read from the output messages, including the current charge fraction, which will increase over time (assuming no leakage models have been applied). Using the standard Get Out Messages method, the two messages that are returned will include the storage message, providing information about the current battery state and configuration, and the power node message, which is central to all components that can be affected by the power system. The Read Power Storage method must be used on the PowerStorageMsg output.
The same is true with the solar panel. The solar panel is a power source and has a dedicated power source message that can be read and data can be pulled from. The Read Power Source method must be used on the PowerSourceMsg, which includes an active flag that can be disabled to prevent the solar panel from producing power.
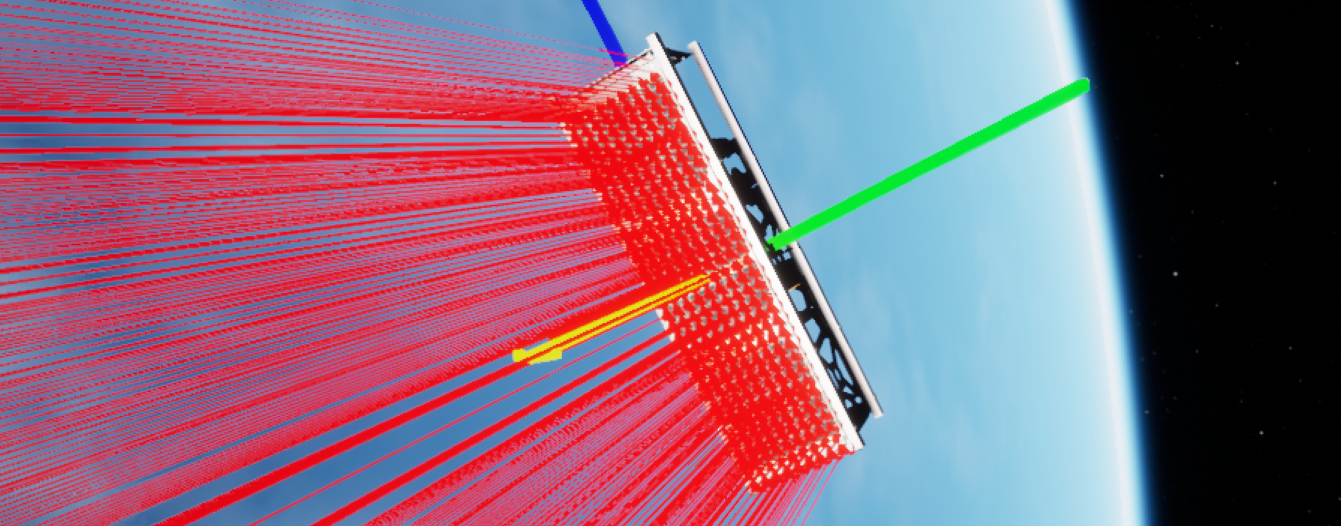
Raycasting Self-Shadowing
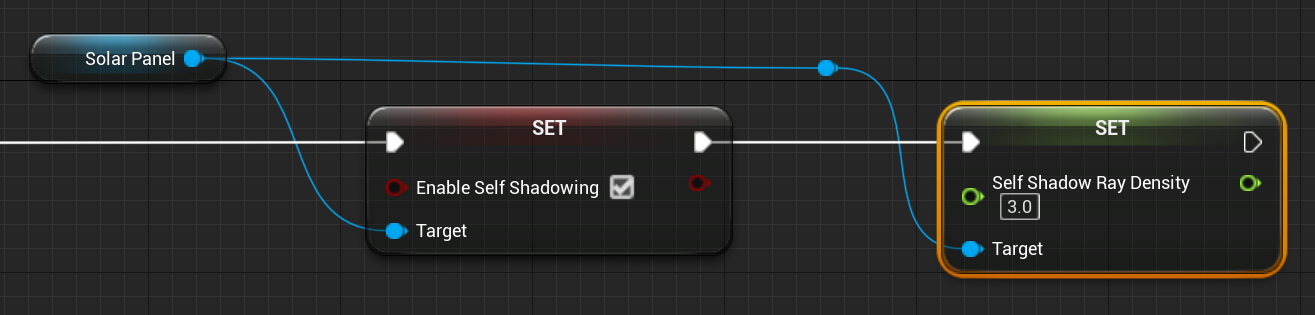
By default, the solar panel does not model self-shadowing and only takes into account the Eclipse data from the celestial bodies that may be blocking the sun. If a solar panel is hidden behind some object on the spacecraft, it will not detect any power lost due to the spacecraft obstructing the object. However, using the power of the Unreal Engine mechanics, an option has been enabled to allow the calculation of the self-shadowing value to be multiplied by the power value returned. This must be turned on and can be turned on within the panel blueprint or the level editor. The ray density in rays/cm$^2$ can also be edited.
Warning
Enabling self-shadowing allows raycasts to be drawn to the solar panel with a particular amount specified in the level blueprint. More rays will mean a more accurate calculation, but will also decrease simulation performance.
The image below will not be shown in Nominal Editor unless the Debug option is turned on, allowing for the rays to be visualized when self-shadowing is enabled. Each ray will pass through any objects and if any objects are blocking the sun, a portion of the solar panel power will be reduced.