Power Network: Configuring a Spacecraft
Creating a New Simulation
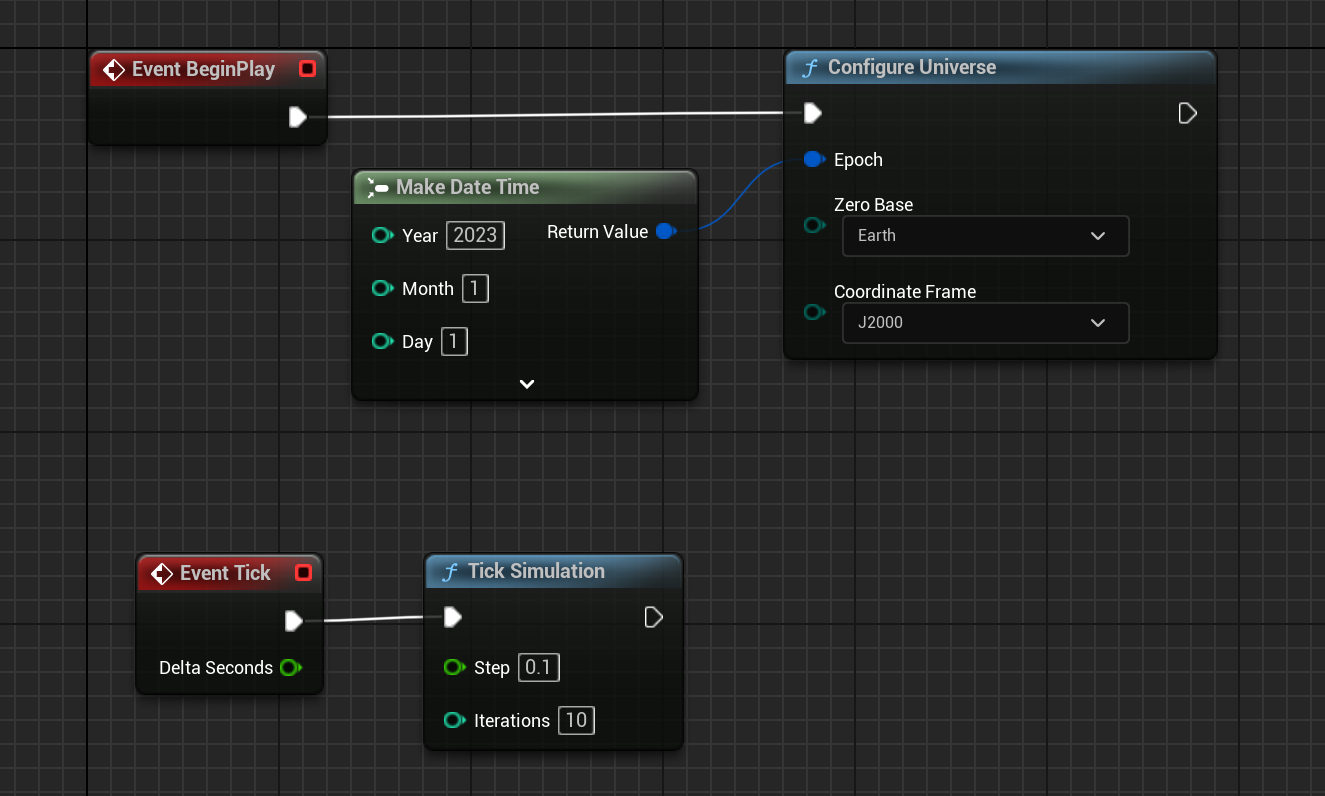
A new simulation will be created for this tutorial series. The level will be named Tutorial_03_PowerNetwork. Within the level blueprint, on the Begin Play event, the universe should be initialized to the epoch of 12:00:00 PM, Jan 01, 2023. Similarly, on the Tick event, the simulation should be ticked with a default value for the ticking parameters.
Creating a Spacecraft
A new spacecraft will be designed for this tutorial, named BP_Spacecraft_Tutorial_03. The base class will be the BP_Spacecraft_Empty_3U model, which includes a 3-unit chassis for the spacecraft. The spacecraft will need to include the following components attached:
- Two 3U solar panels (
BP_NS_SolarPanel_3U) - A reaction wheel stack (
BP_NS_ReactionWheel_Quad) - A guidance computer (
BP_NS_GuidanceComputer) - A battery (
BP_NS_Battery_Single)
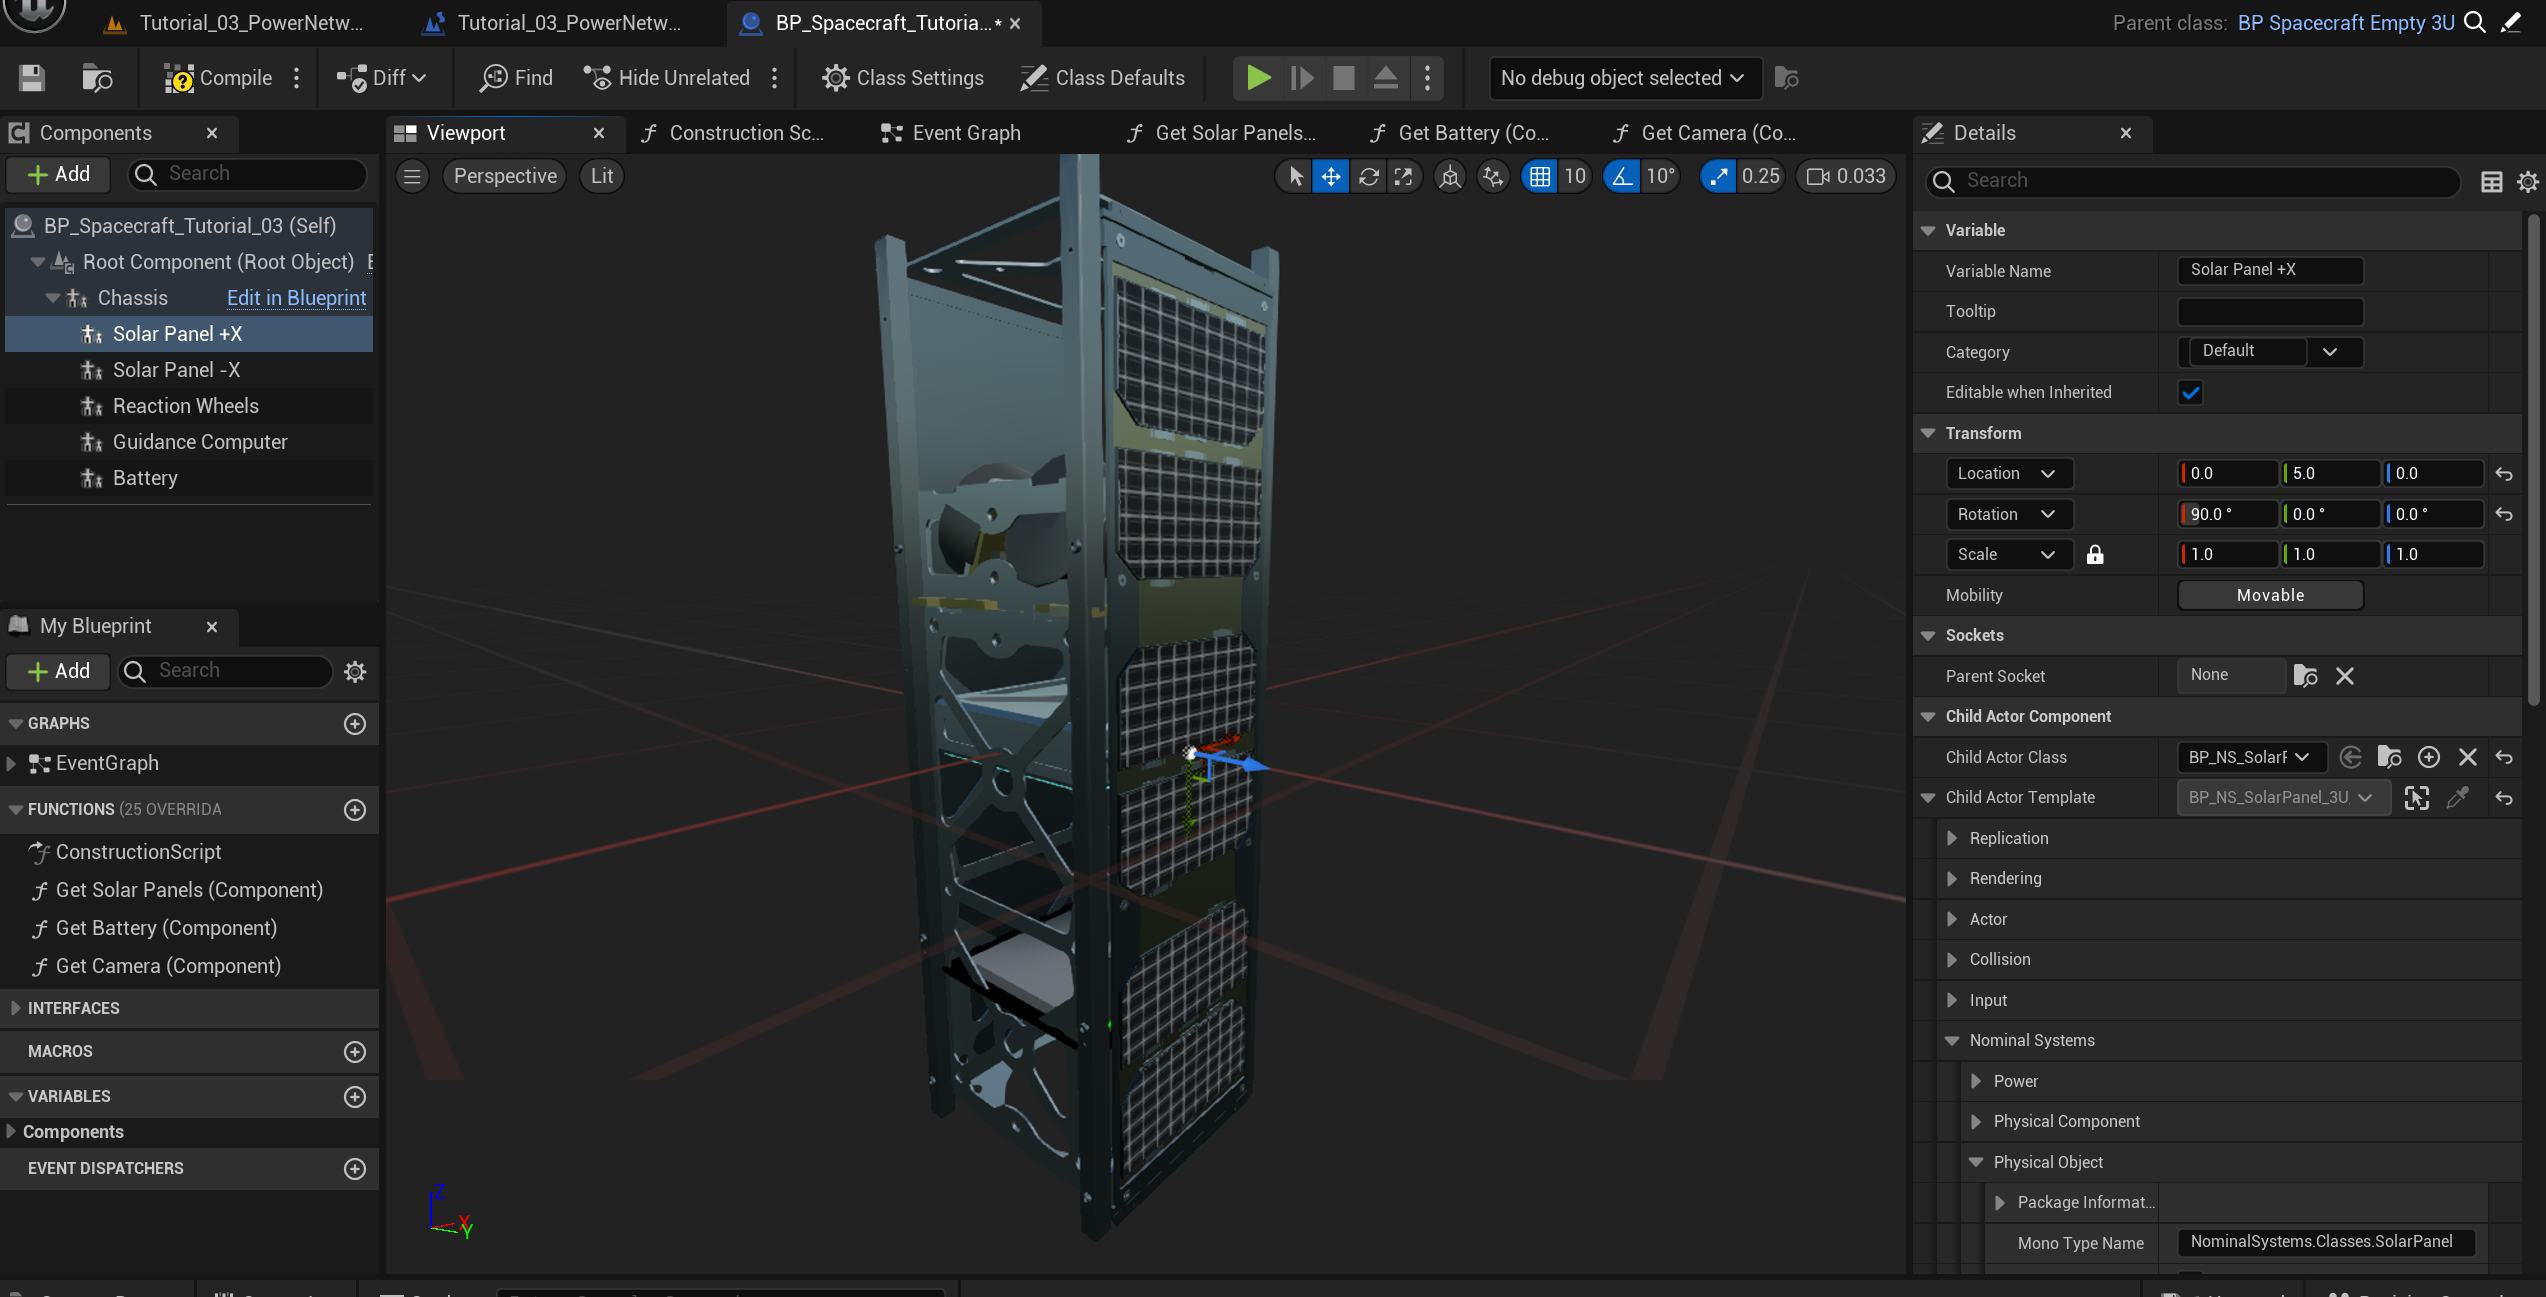
These components can be added to the spacecraft using the child actor components and by selecting one of the default provided assets on the class selection. Once the components have been moved around the viewport and are in a reasonable configuration, the spacecraft may look like the following:
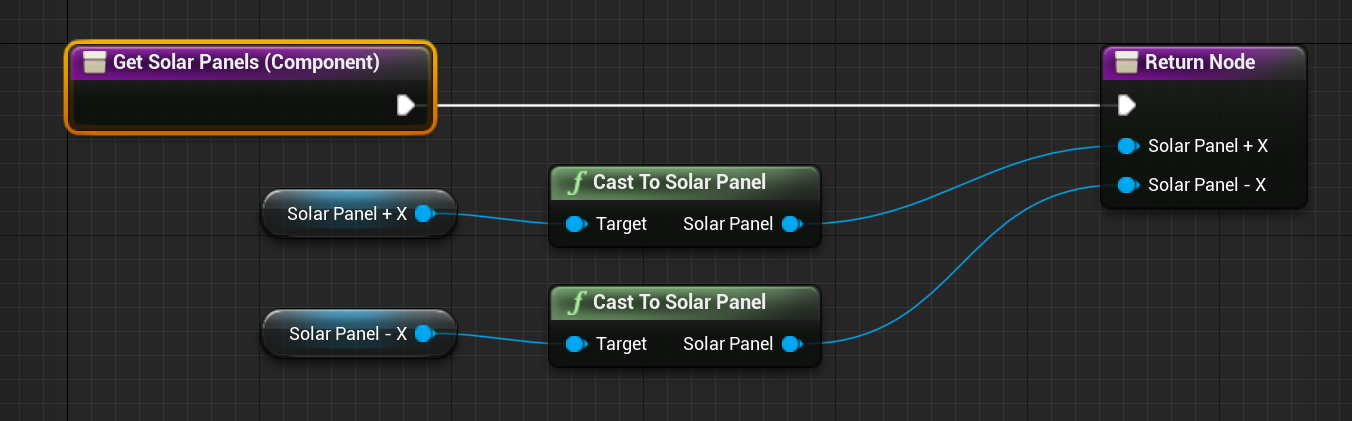
Exposing Components
Similar to the previous tutorial, some of the components need to be exposed so that they can be used by the level blueprint. The reaction wheels and the guidance computer will not be required for this tutorial, so the only components required to be exposed are the solar panels and the battery. These can be done with some custom blueprint functions.
Note
The battery component has the base type of PowerStorage. When returning values from a ‘Get Component’ function, it is best practice to return the class of the lowest relevant inheritance. That is the lowest level that can be used for all functionality required by it.
Updating the Guidance Computer
For this tutorial, the guidance computer will make use of the velocity pointing software mode. This will attempt to orient the spacecraft’s primary payload (which will be the camera that is added later) towards the direction of the spacecraft’s velocity. It is also important to change the controller from an idle form to the MRP feedback loop.
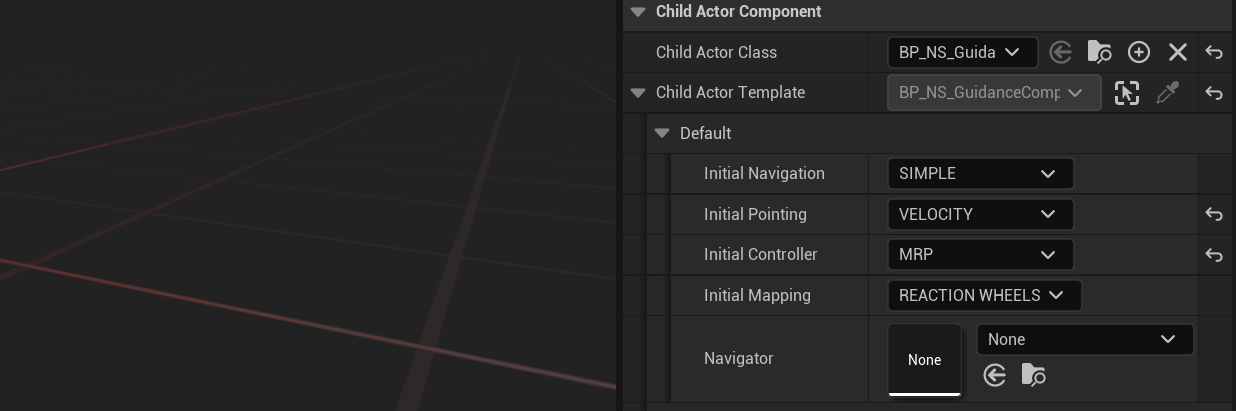
Note
The yellow arrows to the right of a variable indicate that the value has been changed from the default value. Pressing the yellow arrow will return the value to the default value for that particular variable.
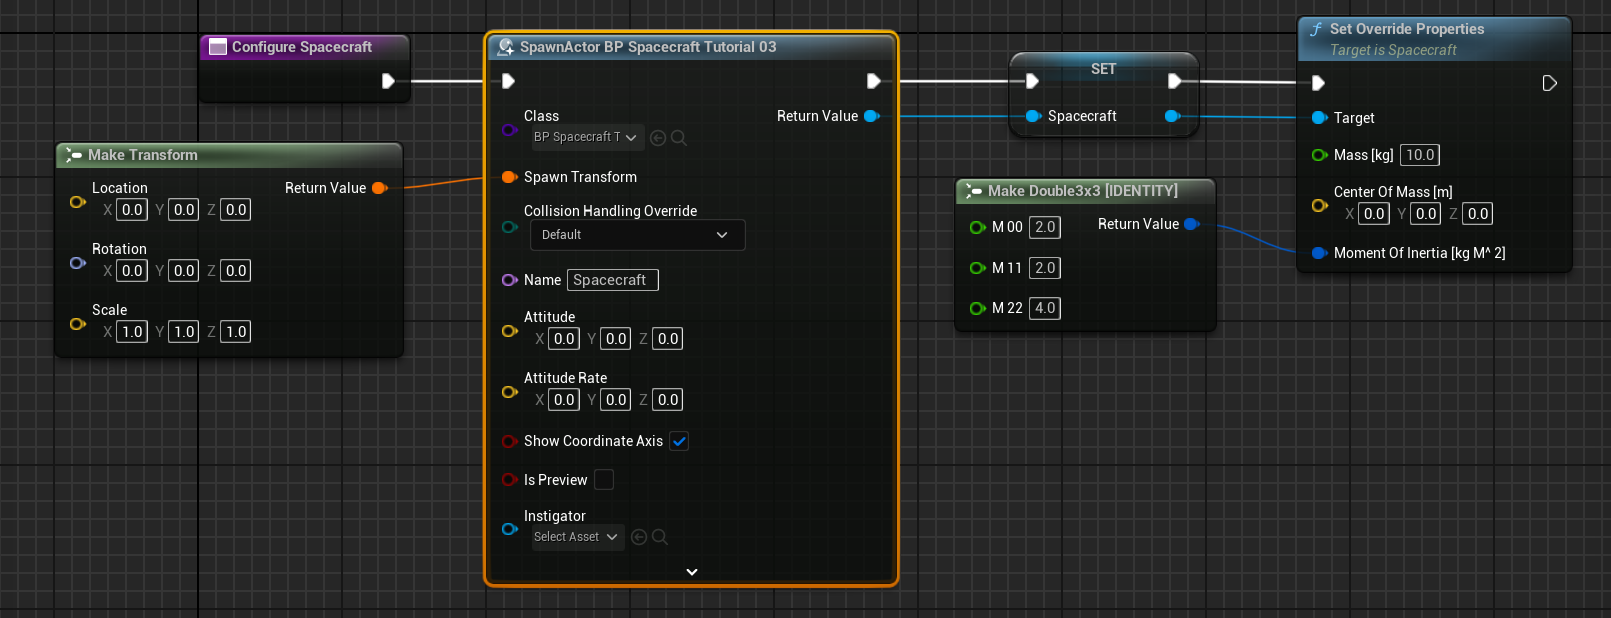
Spawning the Spacecraft
The spacecraft is spawned on the level blueprint on the Begin Play event after the universe is configured. This is typically done in its function. The spacecraft will also make use of the custom mass override function with some standard values.
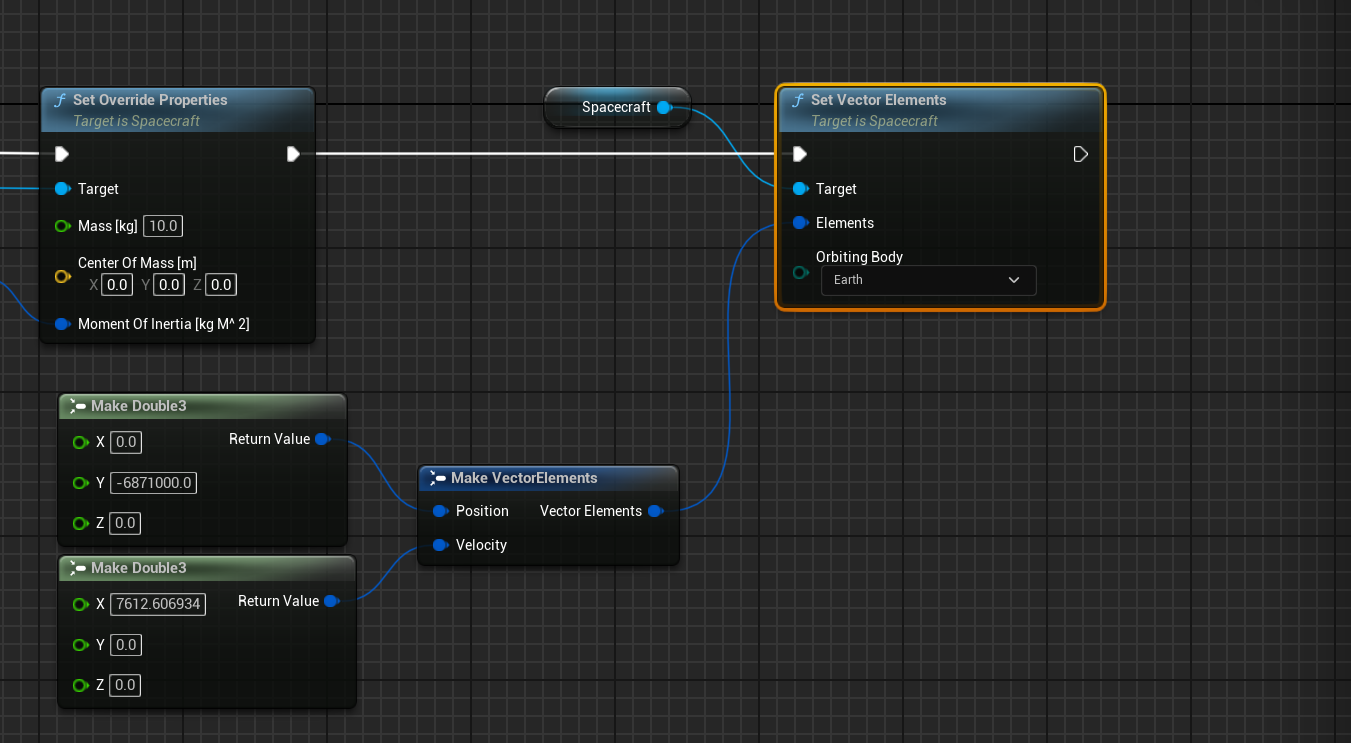
Initializing Vector Elements
There are several ways to initialize the orbit of a spacecraft. On a low level, initializing an orbit requires setting the position and velocity of the craft in inertial space relative to some celestial body. Classical elements include the six Keplerian elements and geodetic elements allow for a specific latitude and longitude point to start at. A raw form of the position and velocity can also be set if desired using the Set Vector Elements function on the spacecraft. The position is in meters and the velocity is in meters per second.