Custom Components: Building the Level
Creating the Level
A new Unreal level can now be created. This level will be named Tutorial_04_CustomComponents. Opening up the level, the standard system should be followed:
- Configure Universe
- Configure Spacecraft
- Configure Components
- Configure User Interface
The Universe can be added by calling the Configure Universe function and passing in a valid epoch. This is done on the Event BeginPlay event in the level blueprint.
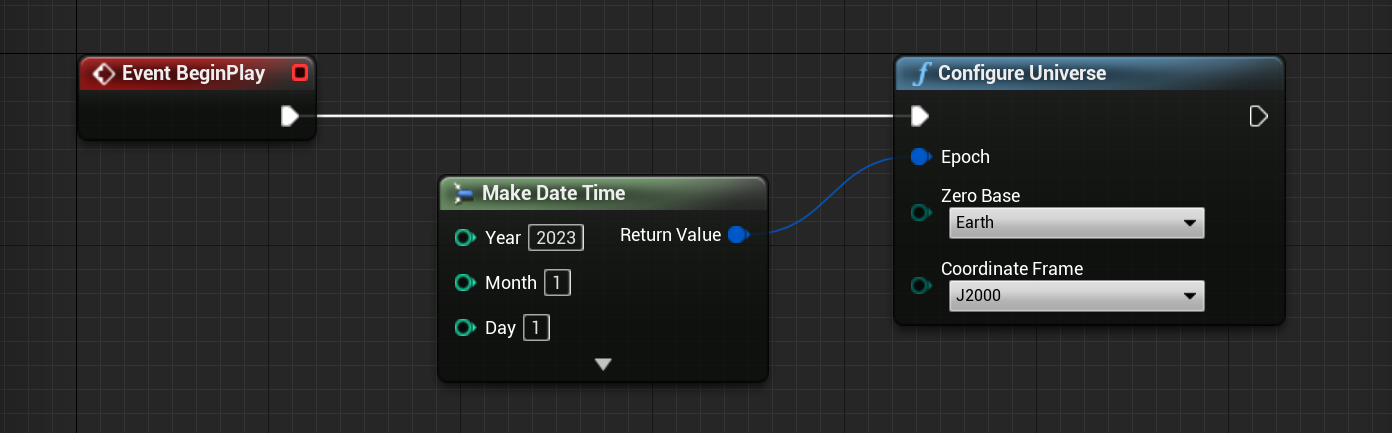
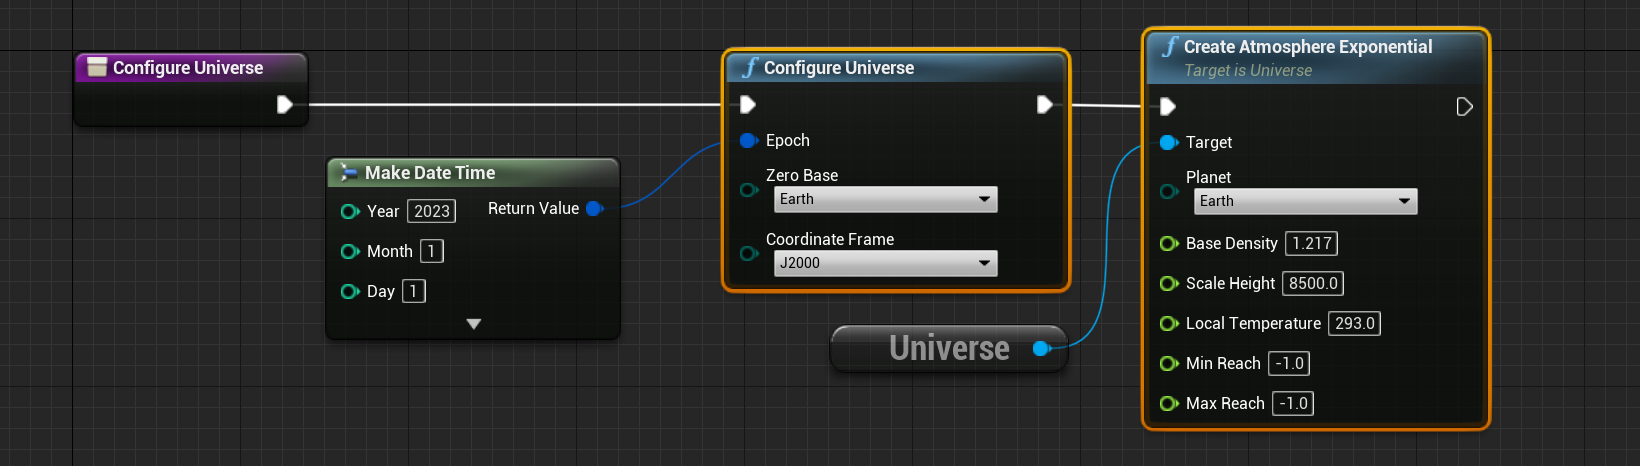
Additionally, because we will be using the atmosphere message in the thermal sensor, the atmosphere model must be added to the level. This can be done on the Universe System and can either spawn in the Exponential atmosphere model or the MSISE atmosphere model. The MSISE model is more computationally expensive but much more accurate. The exponential atmosphere assumes a constant temperature across the orbit. The Create Atmosphere Exponential function will be added in the second of these two models.
Warning
If no atmosphere is configured, then the spacecraft atmosphere message will be empty and will have a constant temperature of 0 degrees at all times.
Spawning a Spacecraft
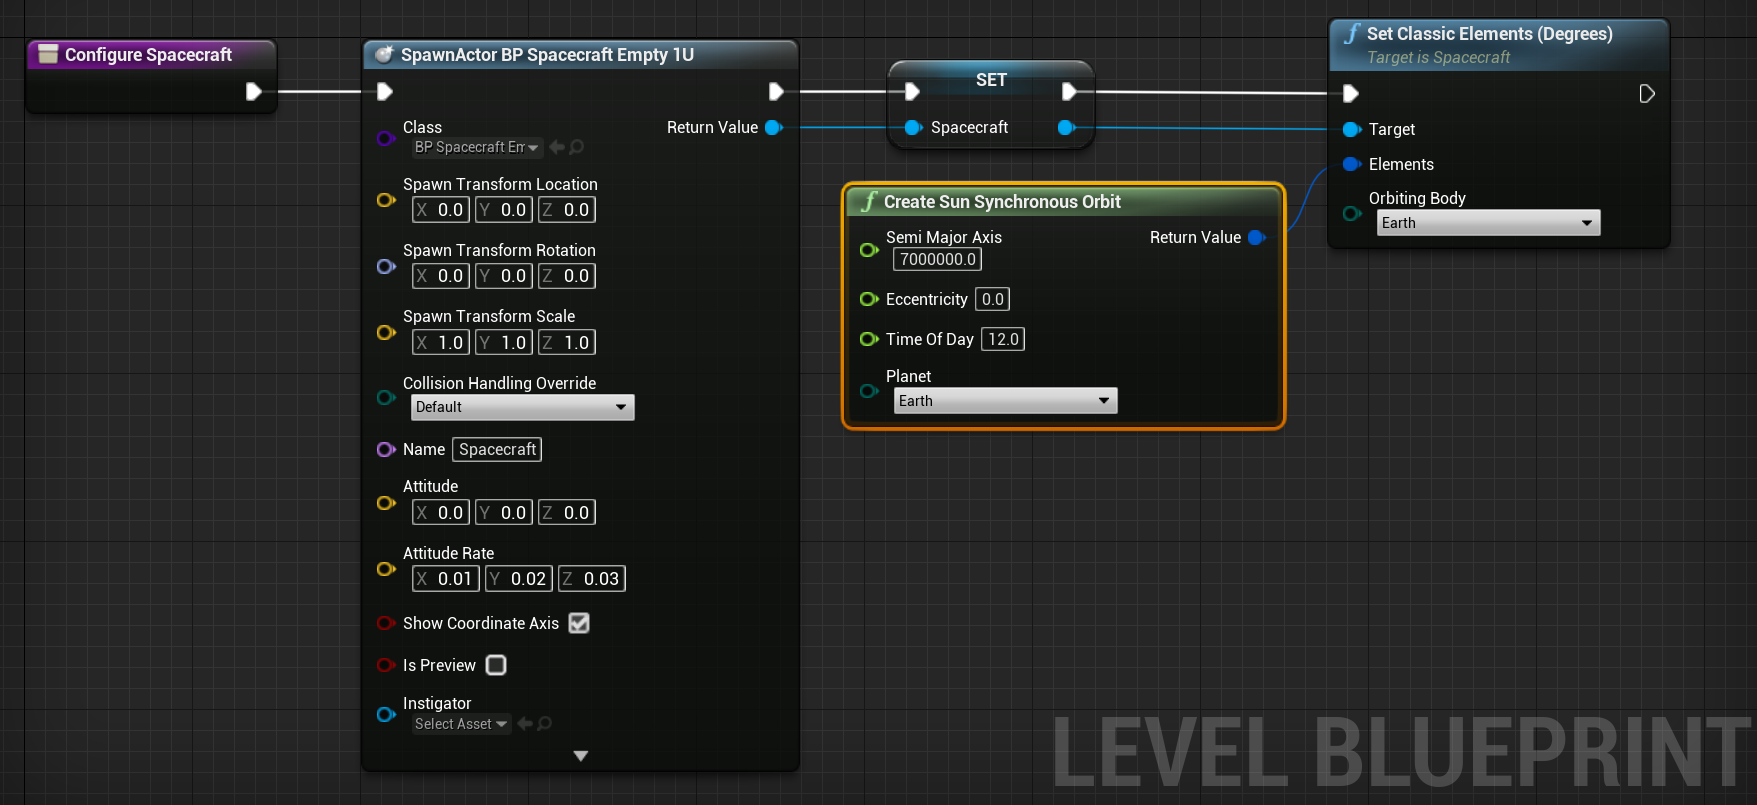
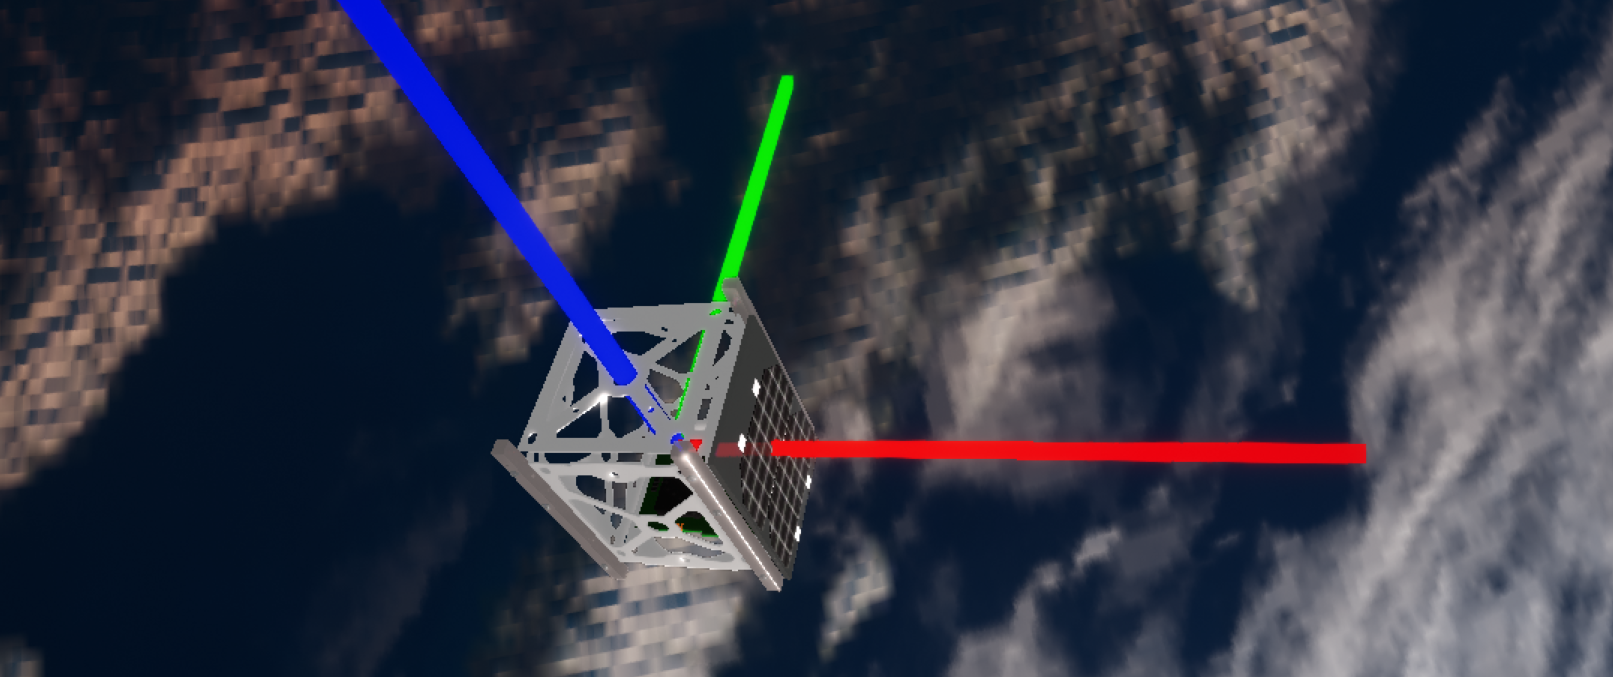
The next step is to spawn a spacecraft into the level. This will be done in a dedicated function and will spawn in the spacecraft of the type BP_Spacecraft_Empty_1U. The orbit will be set to a sun-synchronous orbit, with a crossing point of 12 hours. This can be done using the Create Sun Synchronous Orbit function which returns a series of classical elements that can be configured. Additionally, an attitude rate with some spin is started to ensure the spacecraft is constantly spinning.
Spawning Components
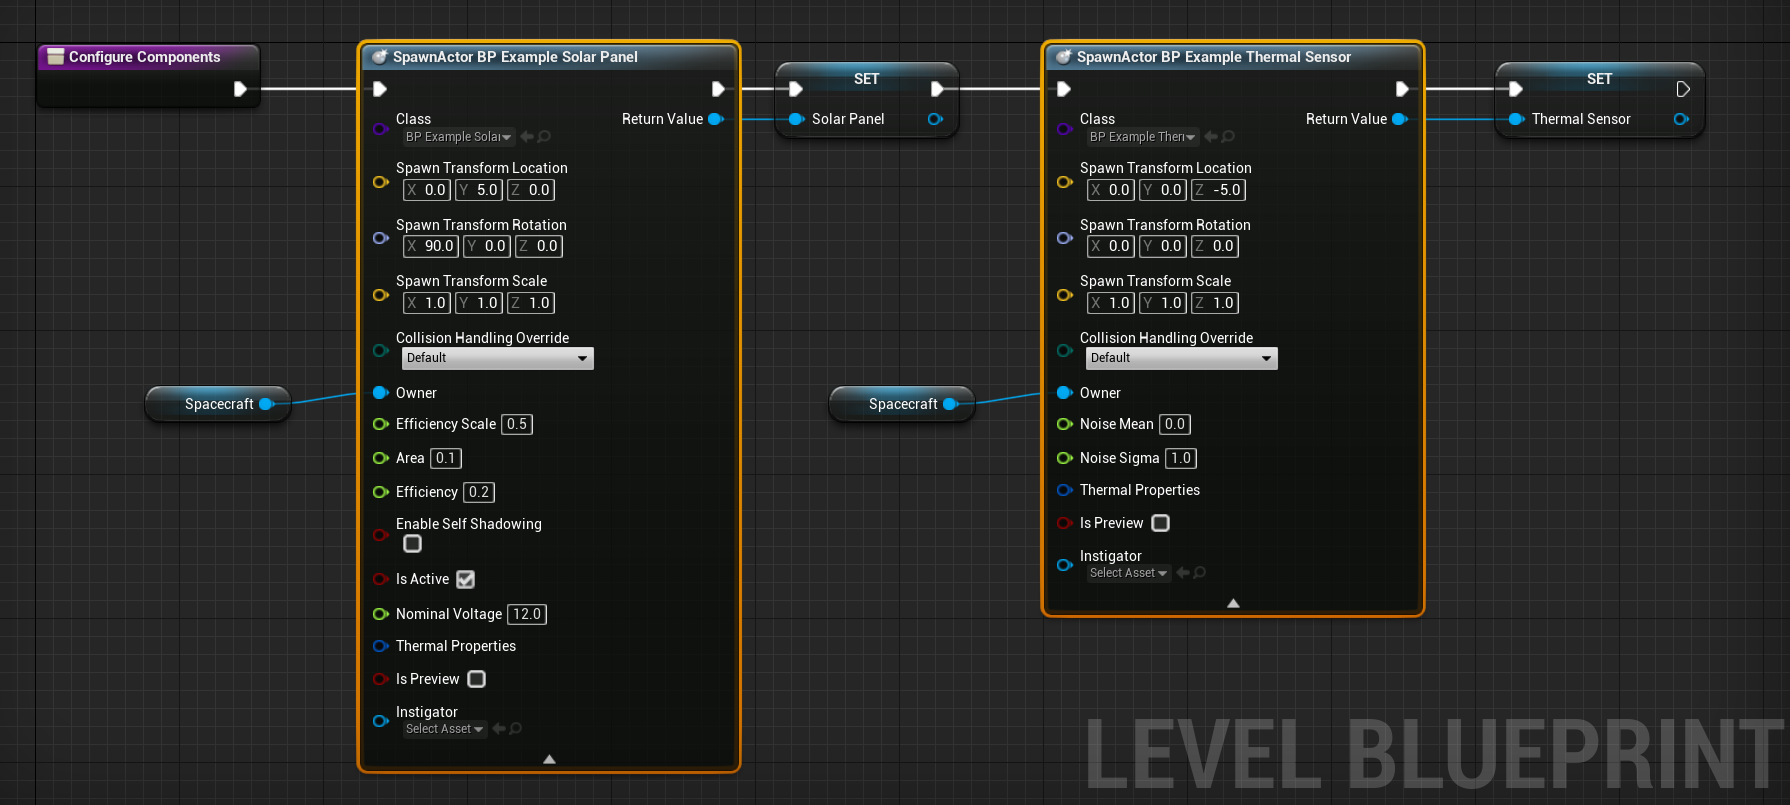
There are two components to add to the spacecraft; the BP_ExampleSolarPanel and the BP_ExampleThermalSensor. These should both be added, with the parent object being the spacecraft that was added. Note that when spawning these objects, make sure to save a reference to the object by right-clicking on the output and selecting ‘promote to variable’. The rotation and position of the components are also changed to ensure they look correct on the chassis.
Note
Make sure to set the Owner property to be the spacecraft. If you can’t find this property, press the arrow at the bottom of the spawn node.
In each case, the public variables that were added before appear here including the Efficiency Scale, Noise Mean and Noise Sigma.
Ticking the Simulation
Once the components are added, the last step is to call the Tick Simulation event on the event graph on the Event Tick event. This will tick the simulation ten times every Unreal frame with a 0.1s interval in each tick.

If everything has been added correctly and the class names are valid, then the simulation will tick correctly and the spacecraft will spawn.
Debugging Errors
Check the output log to see if there are any errors and filter by Errors.

If there are any errors there, or the simulation does not add the components correctly, check the following is all correct:
- The C# solution was compiled correctly before Nominal Editor was opened
- The C# names in the components are correct as per the previous tutorial
- The C# property names in the components are correct as per the previous tutorial
- All components are added to the level blueprint